On-Call Schedules
Creating an On-Call Schedule
Create schedules to manage your on-call rotations
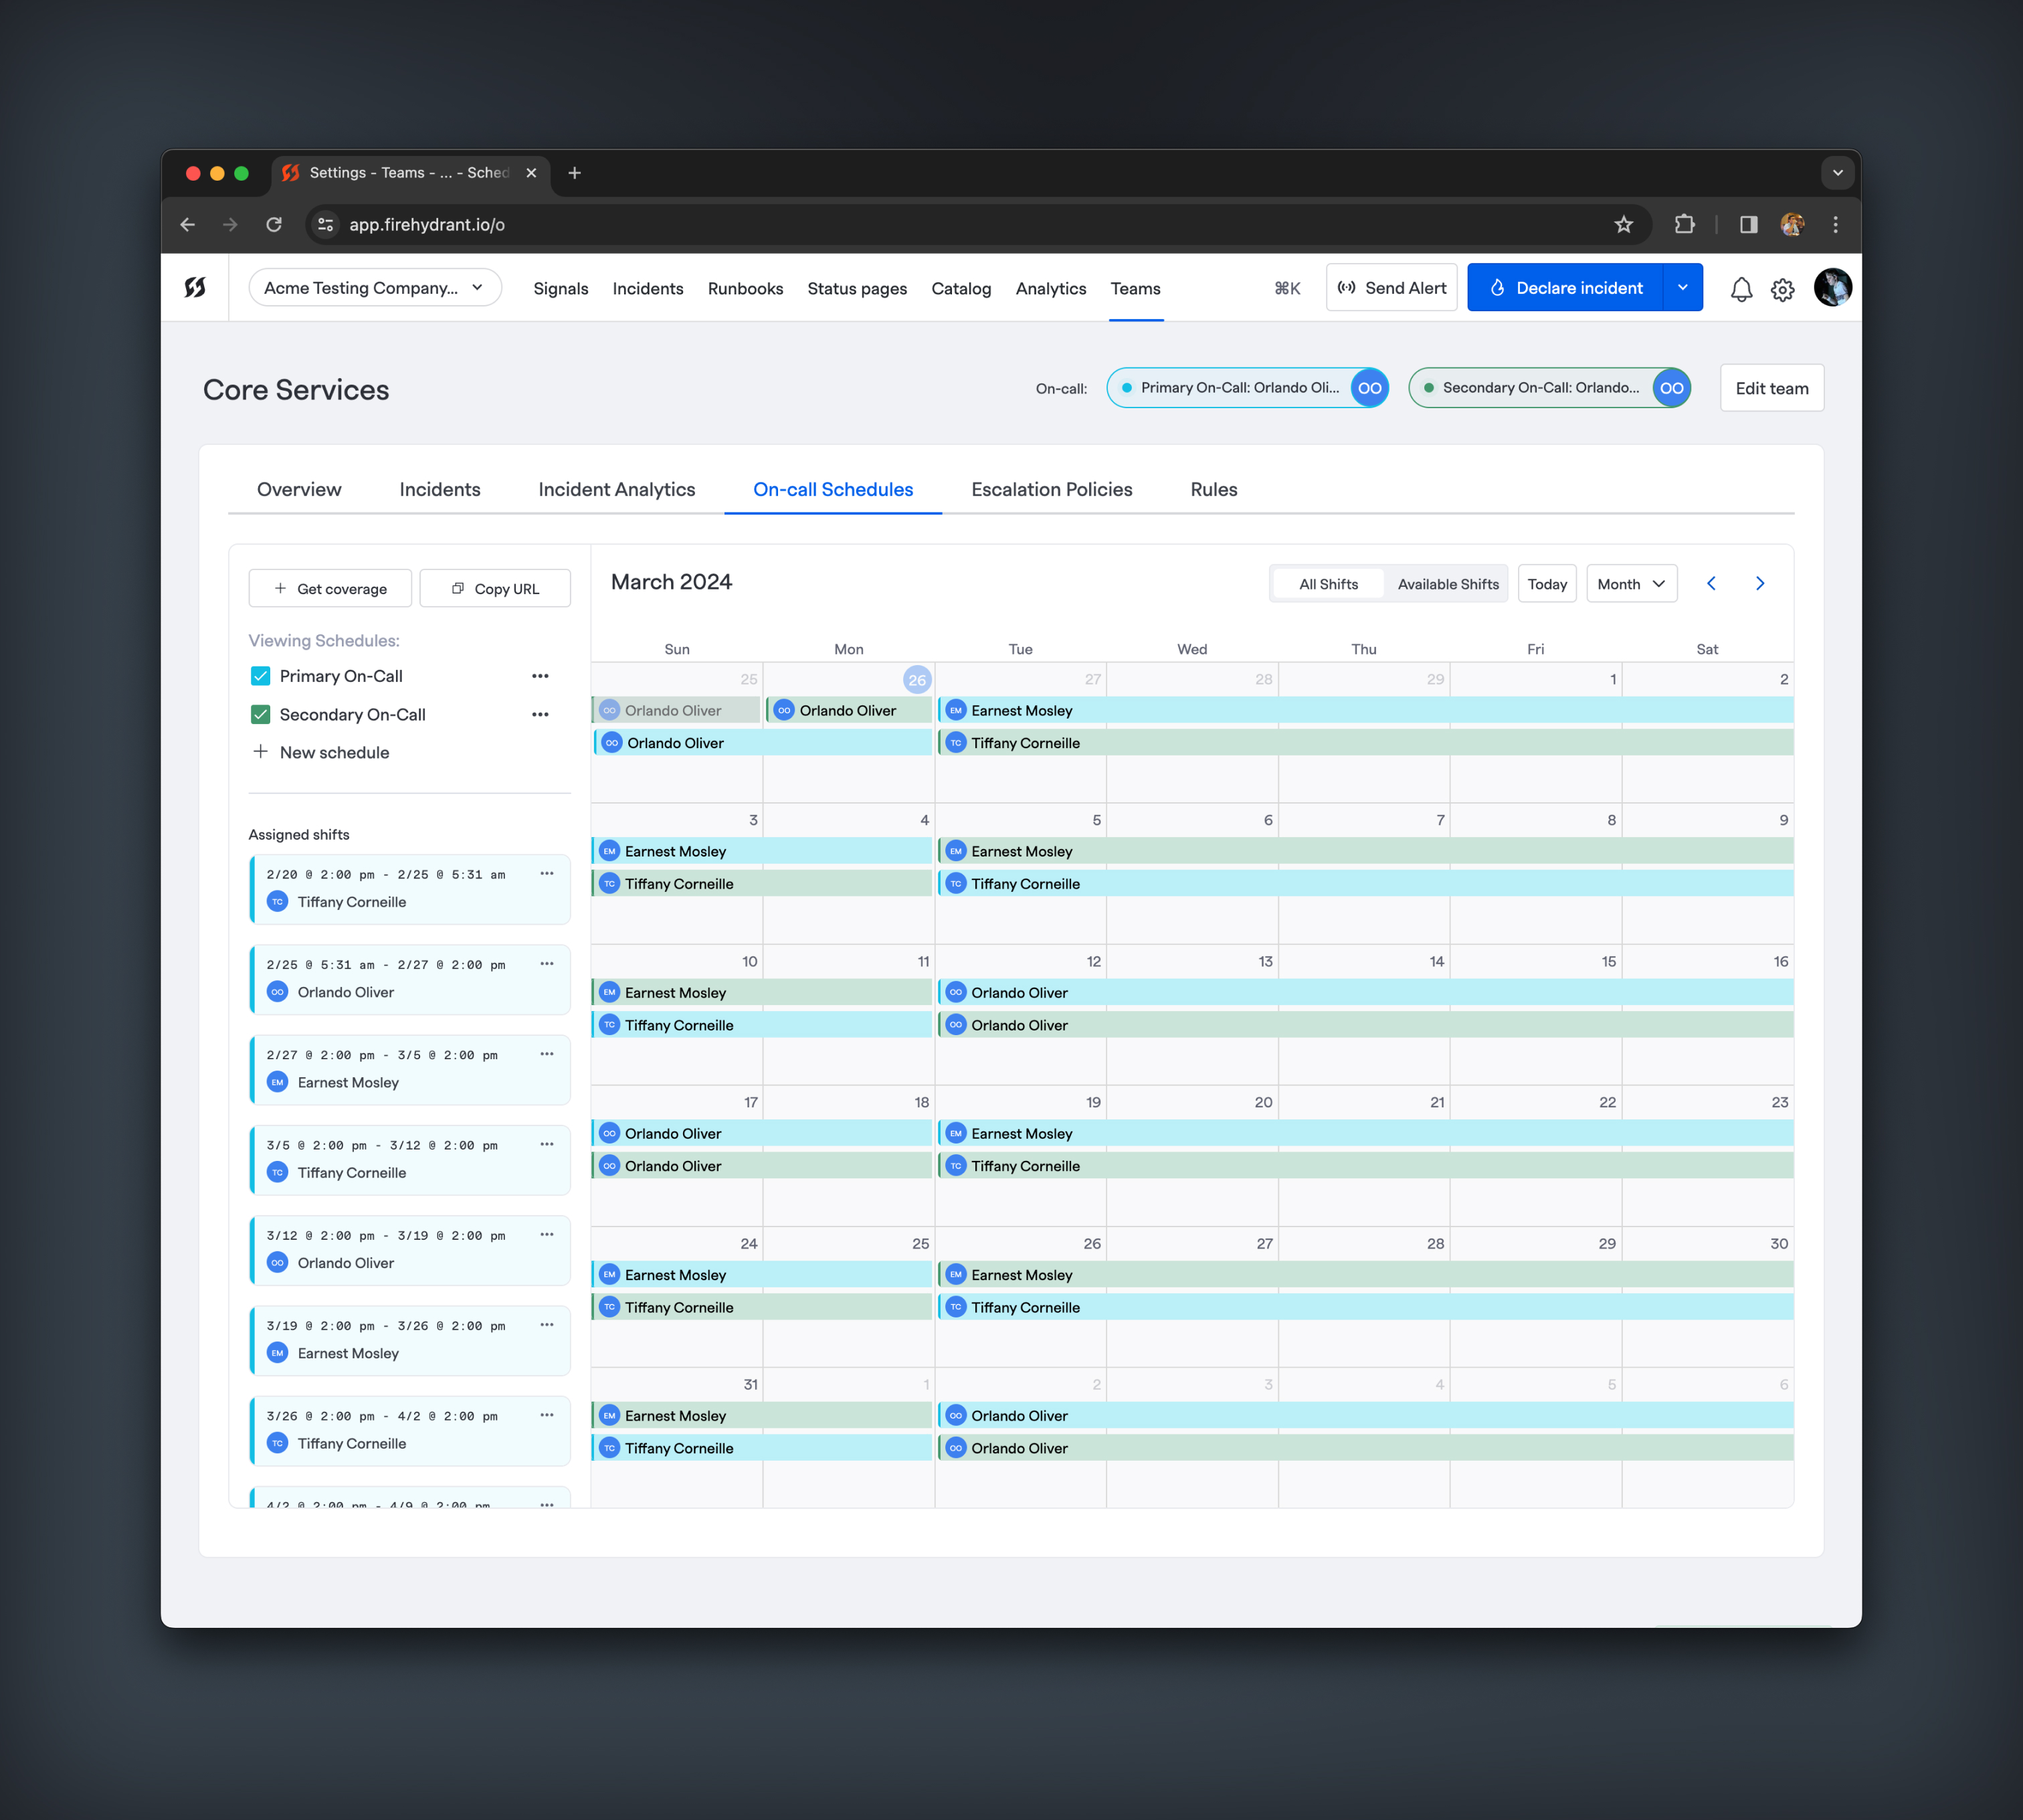
On-call schedules help teams define rotations of people who respond to pages. When viewing a team's on-call schedules, all events are shown in the user's local timezone.
To create an On-Call Schedule for a team:
- Navigate to the team’s page in FireHydrant (Teams > Team Name) and click on the “On Call Schedules” tab for the team.
- In the left-hand panel, click “New Schedule.”
- Add a name and description to help you and other users of FireHydrant connect this on-call schedule to escalation policies. Select a color to help distinguish the schedule from other schedules on the calendar.
- Select a Daily, Weekly, or Custom Hand-off option on the left to determine how often your schedule will hand off between on-call shifts. You can then customize the timezone as well as the hand-off day of the week and time.
- Here, you can also customize the working hours of the schedule. Working hours help determine when alerts are sent to a specific schedule. This can be particularly helpful when setting up follow-the-sun schedules and working with multiple schedules across different time zones. You can set working hours as:
- 24/7: responders will receive alerts from the start of the rotation until the it's handed off to the next on-call responder.
- Specific days: select days of the week as well as time windows during which alerts will be delivered to the schedule. You can add multiple time windows that will apply all days
- Custom time windows: if you have specific time blocks across multiple days where you want your on-call responders to receive alerts, you can craft custom start and end date-time pairs to create custom time windows.
- Select a Shift Assignment for how you’d like to schedule users
- Rotation: Rotation-based shift assignment allows you to create a list of your team members. FireHydrant will automatically create shifts and assign users in the order you have them listed.
- Manual: Manual shifts allow you to hand-select an on-call responder for each shift. Your team members can also claim shifts if there is no assigned on-call responder.
Editing On-Call Schedules
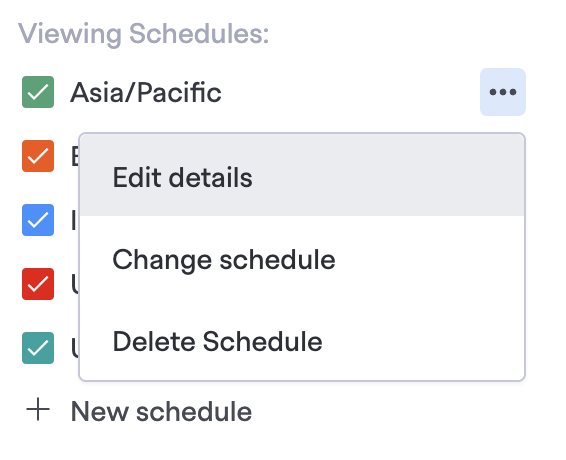
Edit Details: Editing the details of a schedule allows you to easily updates the name, description and color of your schedule.
Change Schedule: Select Change Schedule If you want to change the way that your schedule handles hand-off times, working hours, or the rotation for your on call responders. When making changes, you can select a date to apply the changes you're making so you have precise control over when a new rotation or schedule goes into effect.
Editing a Shift: From any shift view, in the calendar or in a card list, click on the shift and select Edit Shift in the context menu. You'll be able to change the on-call responder for the shift and can even shorten or lengthen the shift (though schedules do not allow for overlapping shifts).
Requesting Coverage for a Shift
For any shift where a responder has been assigned, that responder can request partial or full coverage for their shift. Responders can do this in both the web app and Slack.
In the Web App
- Navigate to the On Call Schedules page for your team.
- In the right-hand column, find the “My Shifts” list.
- If you don’t see the My Shifts list, ensure you have unselected any Schedules in the left-hand column.
- Find the shift you’d like coverage for and click “Get Coverage.”
- Select a Start Date and Time and an End Date and Time.
- For the coverage window you’re selecting, you’ll see a list of all shifts affected by the coverage request (if, for instance, you have a primary and secondary shift at the same time or your coverage window extends into two different shifts).
- Additionally, if coverage is for only part of a shift, you will see a representation of the time requested in the shift card.
- Click “Submit” to create your Coverage Request. Now, your teammates can claim this shift in Slack or the Web App.
In Slack
- In any channel in Slack, you can run the command
/fh cover meand you’ll be prompted to enter aFromDate and Start Time as well as anToDate and End Time. Once you have added those, click “Next.” - Next, you’ll be prompted to add a quick message for your team about why you’re seeking coverage. Once you’ve filled that out, click “Submit.”
- A Coverage Request will be created, and any member of your team can claim the time slot created.
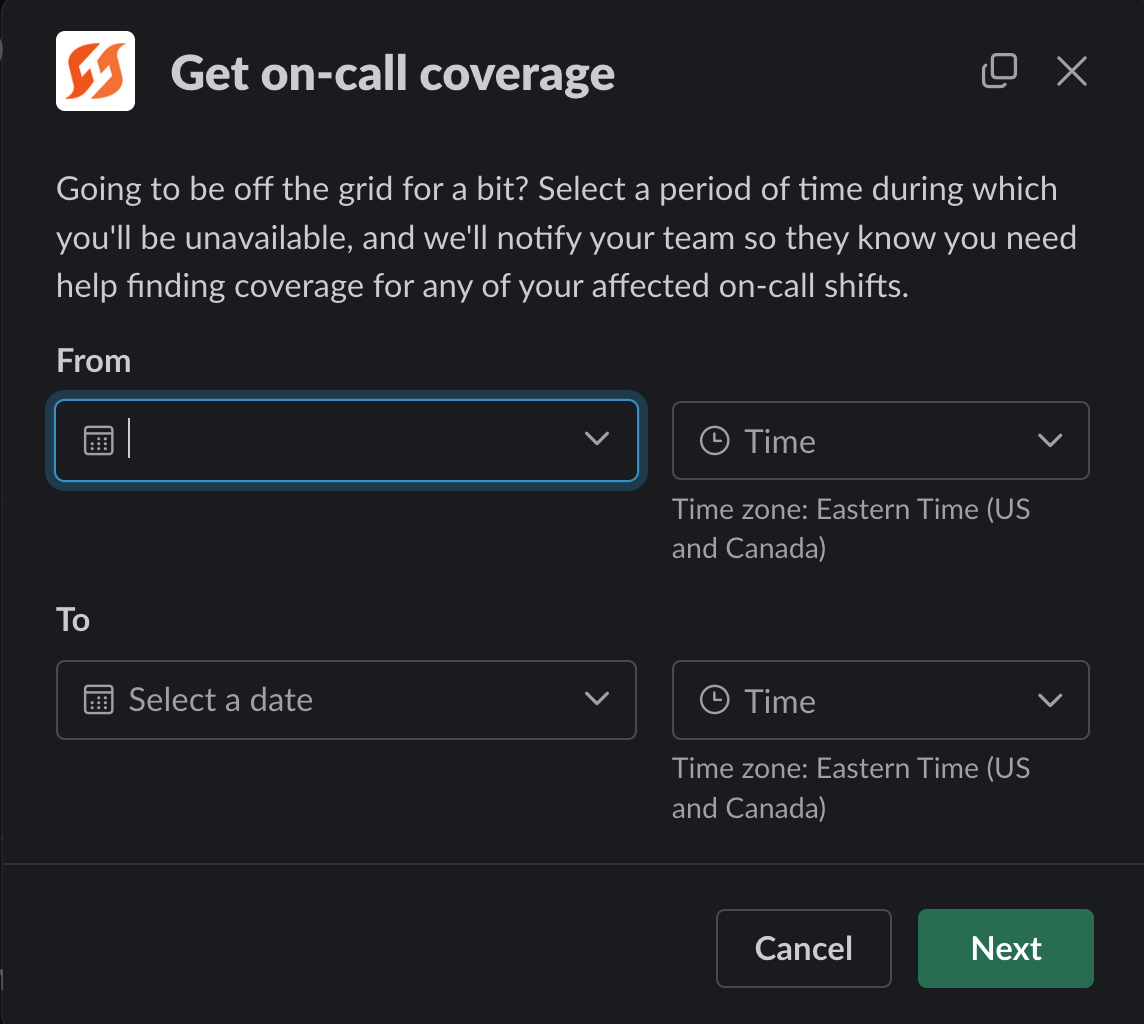
Getting on-call coverage in Slack
Canceling Coverage Requests
At any time, if you no longer need coverage for a shift or partial shift, you can directly cancel the coverage request from the web application or mobile application. Just click on the empty shift generated from the coverage request and click Cancel coverage request.
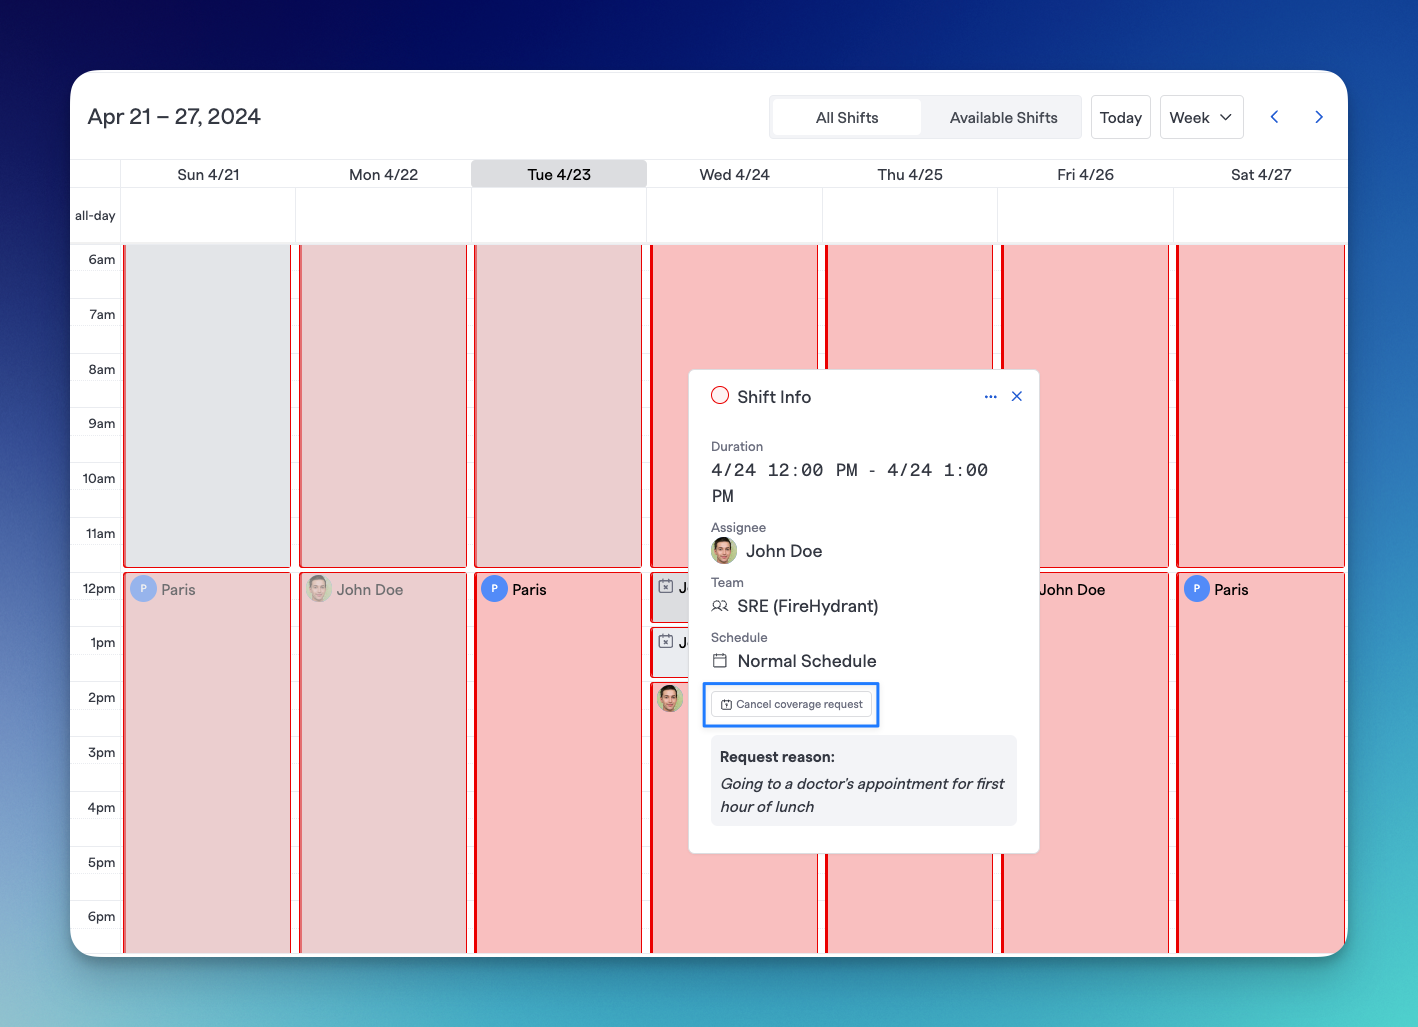
Canceling a coverage request from UI
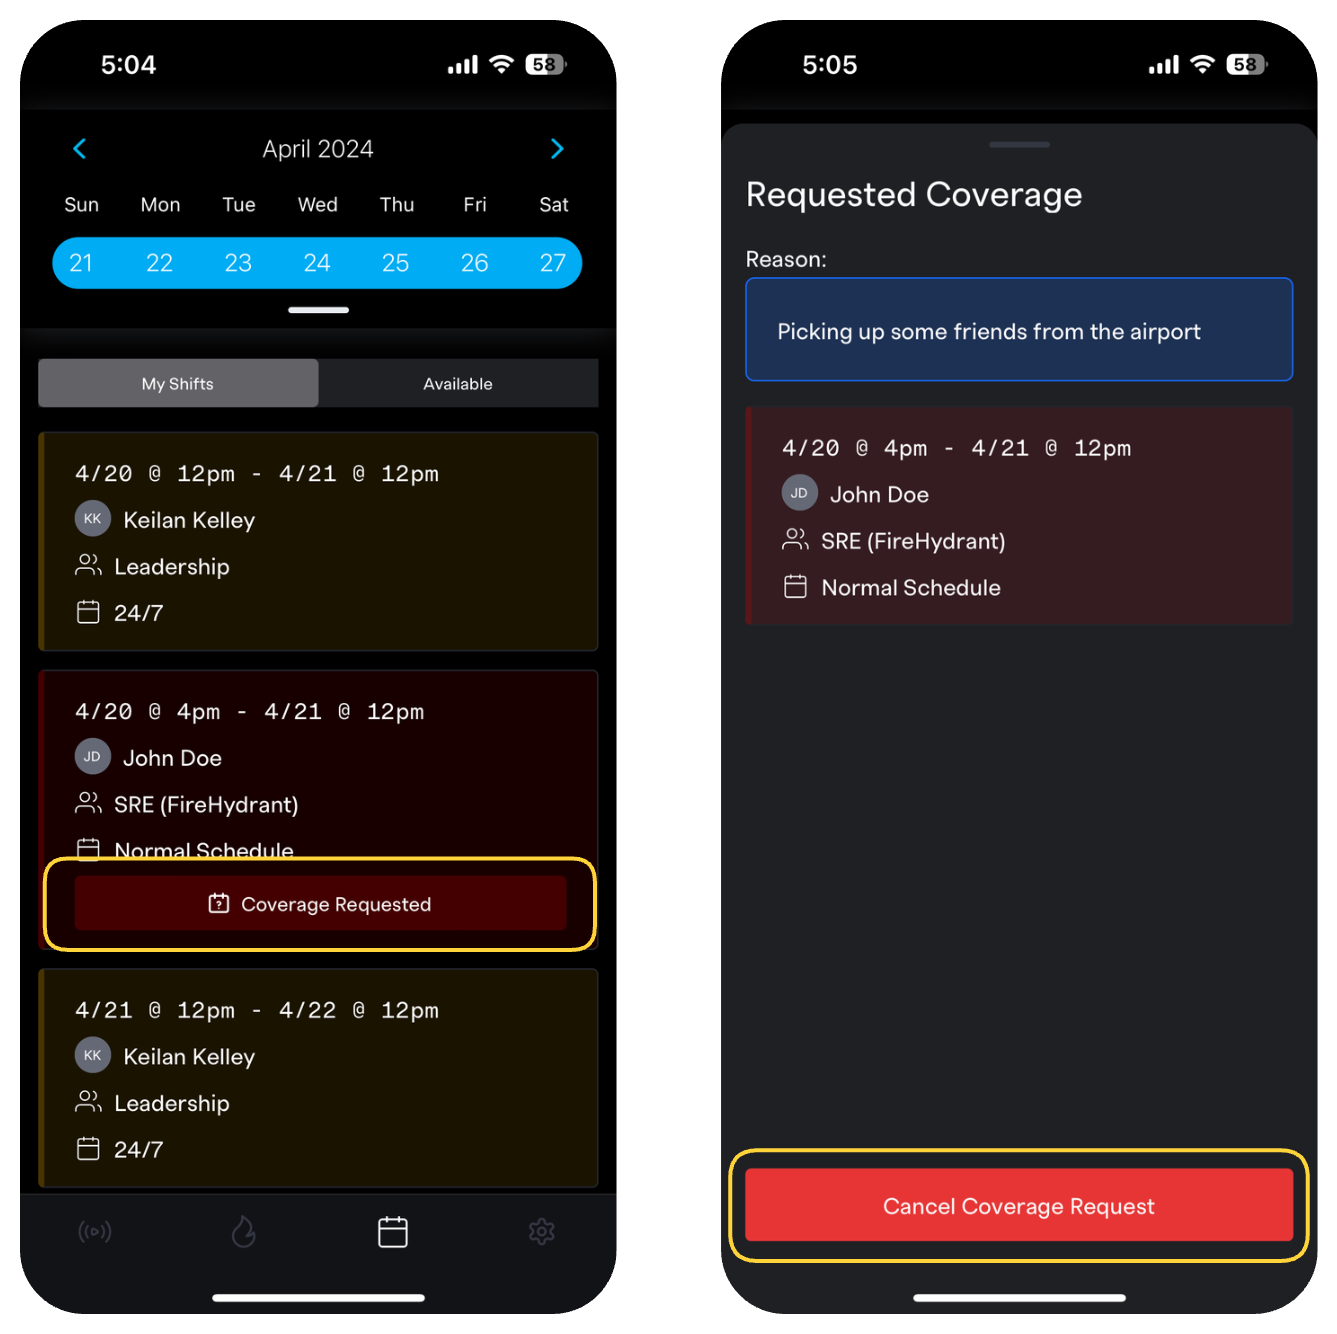
Canceling a coverage request from mobile app
Claiming Shifts
Any time a responder on your team requests coverage for their shift (or part of their shift), all team members will receive a notification via email and Slack. Users can claim the shift directly from that notification.
Claiming a shift in the Web App
- Navigate to the On Call Schedules page for your team. Alternatively, if you click the link from an email notification about someone requesting coverage, this will take you directly to this page.
- At the top of the calendar, toggle from "All Shifts" to "Available Shifts." For any available shift, you can "claim" that shift, and you will be assigned to it.
- That shift will appear in the “My Shifts” section on the dashboard.
Claiming a shift in Slack
When a user requests coverage and their team has a linked Slack channel, FireHydrant will post a notification message to that team's channel and an action button to "Claim shift." This opens a modal confirming the claim and other pertinent details.
Once a shift has been claimed, an email will be sent to the team's members, and if a team Slack channel is configured, it will also post into the team's Slack channel. If not, the person who originally requested the coverage will receive a private message from FireHydrant in Slack notifying them their coverage request was handled.
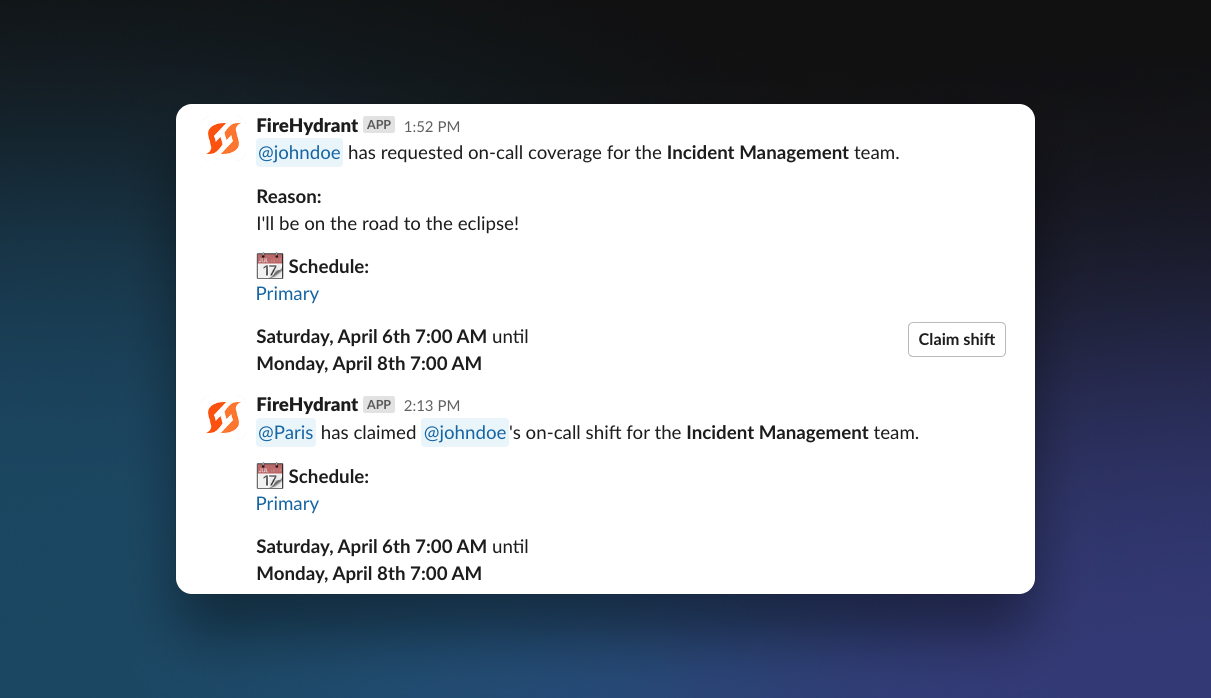
Example of requested + claimed shift notification messages in a team's Slack channel
Overrides
Overriding a full or partial shift
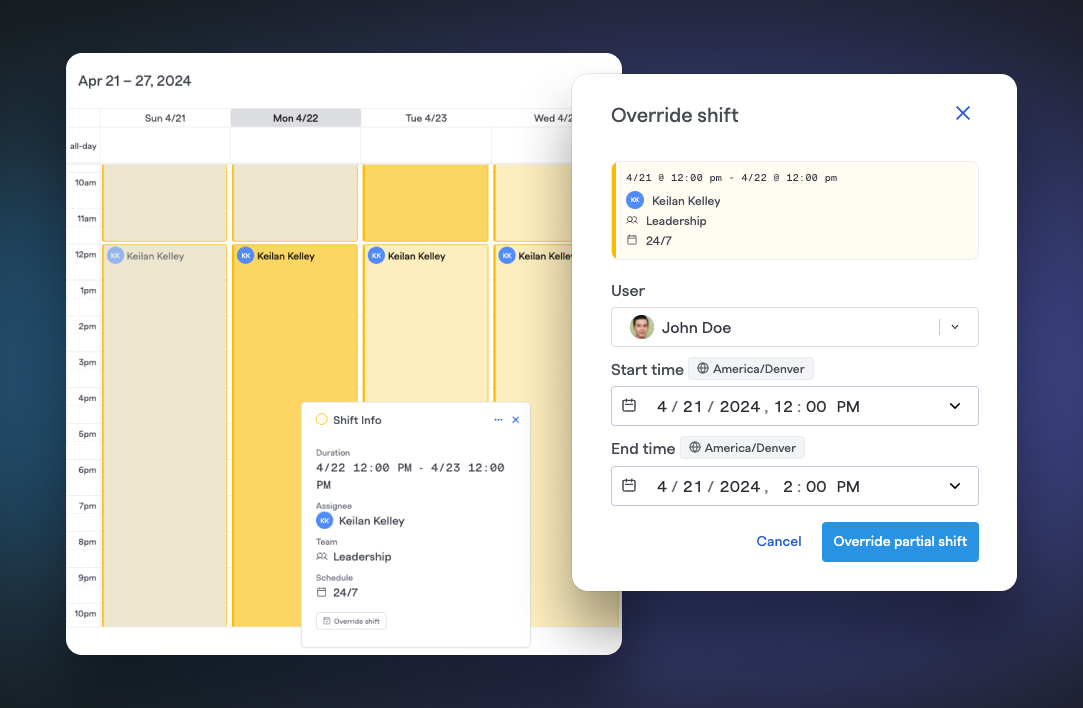
If you already know a shift or portion of a shift you'd like to claim from someone else, they do not need to submit a coverage request. You can go directly to their shift in the on-call schedules page, click on a shift, and then click Override shift.
This will open an additional modal where you can specify the start/end times of the overrides. It will default to overriding the whole shift, so if you only want to claim a partial of the shift, change the date and time as needed.
Note:
Overriding a shift does not notify the team's Slack channel or user who owned the shift.
Permissions
Users with Member permissions can configure and update any on-call schedules within any teams they are members of. Users with Owner permission can edit the same for all teams regardless of their membership or lack thereof.
For more information, visit Role-Based Access Controls.
Updated 5 days ago