Asana
Integrating FireHydrant with Asana enables you to create and sync incidents and action items created in FireHydrant with tickets in Asana.
At the end of this guide you'll be able to:
- Automatically create Asana tickets when incidents are declared in FireHydrant
- Create follow up tasks in Asana from FireHydrant
- Map additional fields from FireHydrant into Asana
Let's ride!
Prerequisites
- Ensure you have Owner permissions. Only users with the Owner role can manage integrations in FireHydrant.
- You'll need a service account/user with administrative permissions in Asana.
Note:
FireHydrant will create and manage data as the user that is logged in to Asana when performing the installation. FireHydrant recommends using a generic Asana service account rather than an individual named user to avoid problems if the named employee were to depart the organization.
Installing the integration
- Go to the Integrations page and search for the Asana tile.
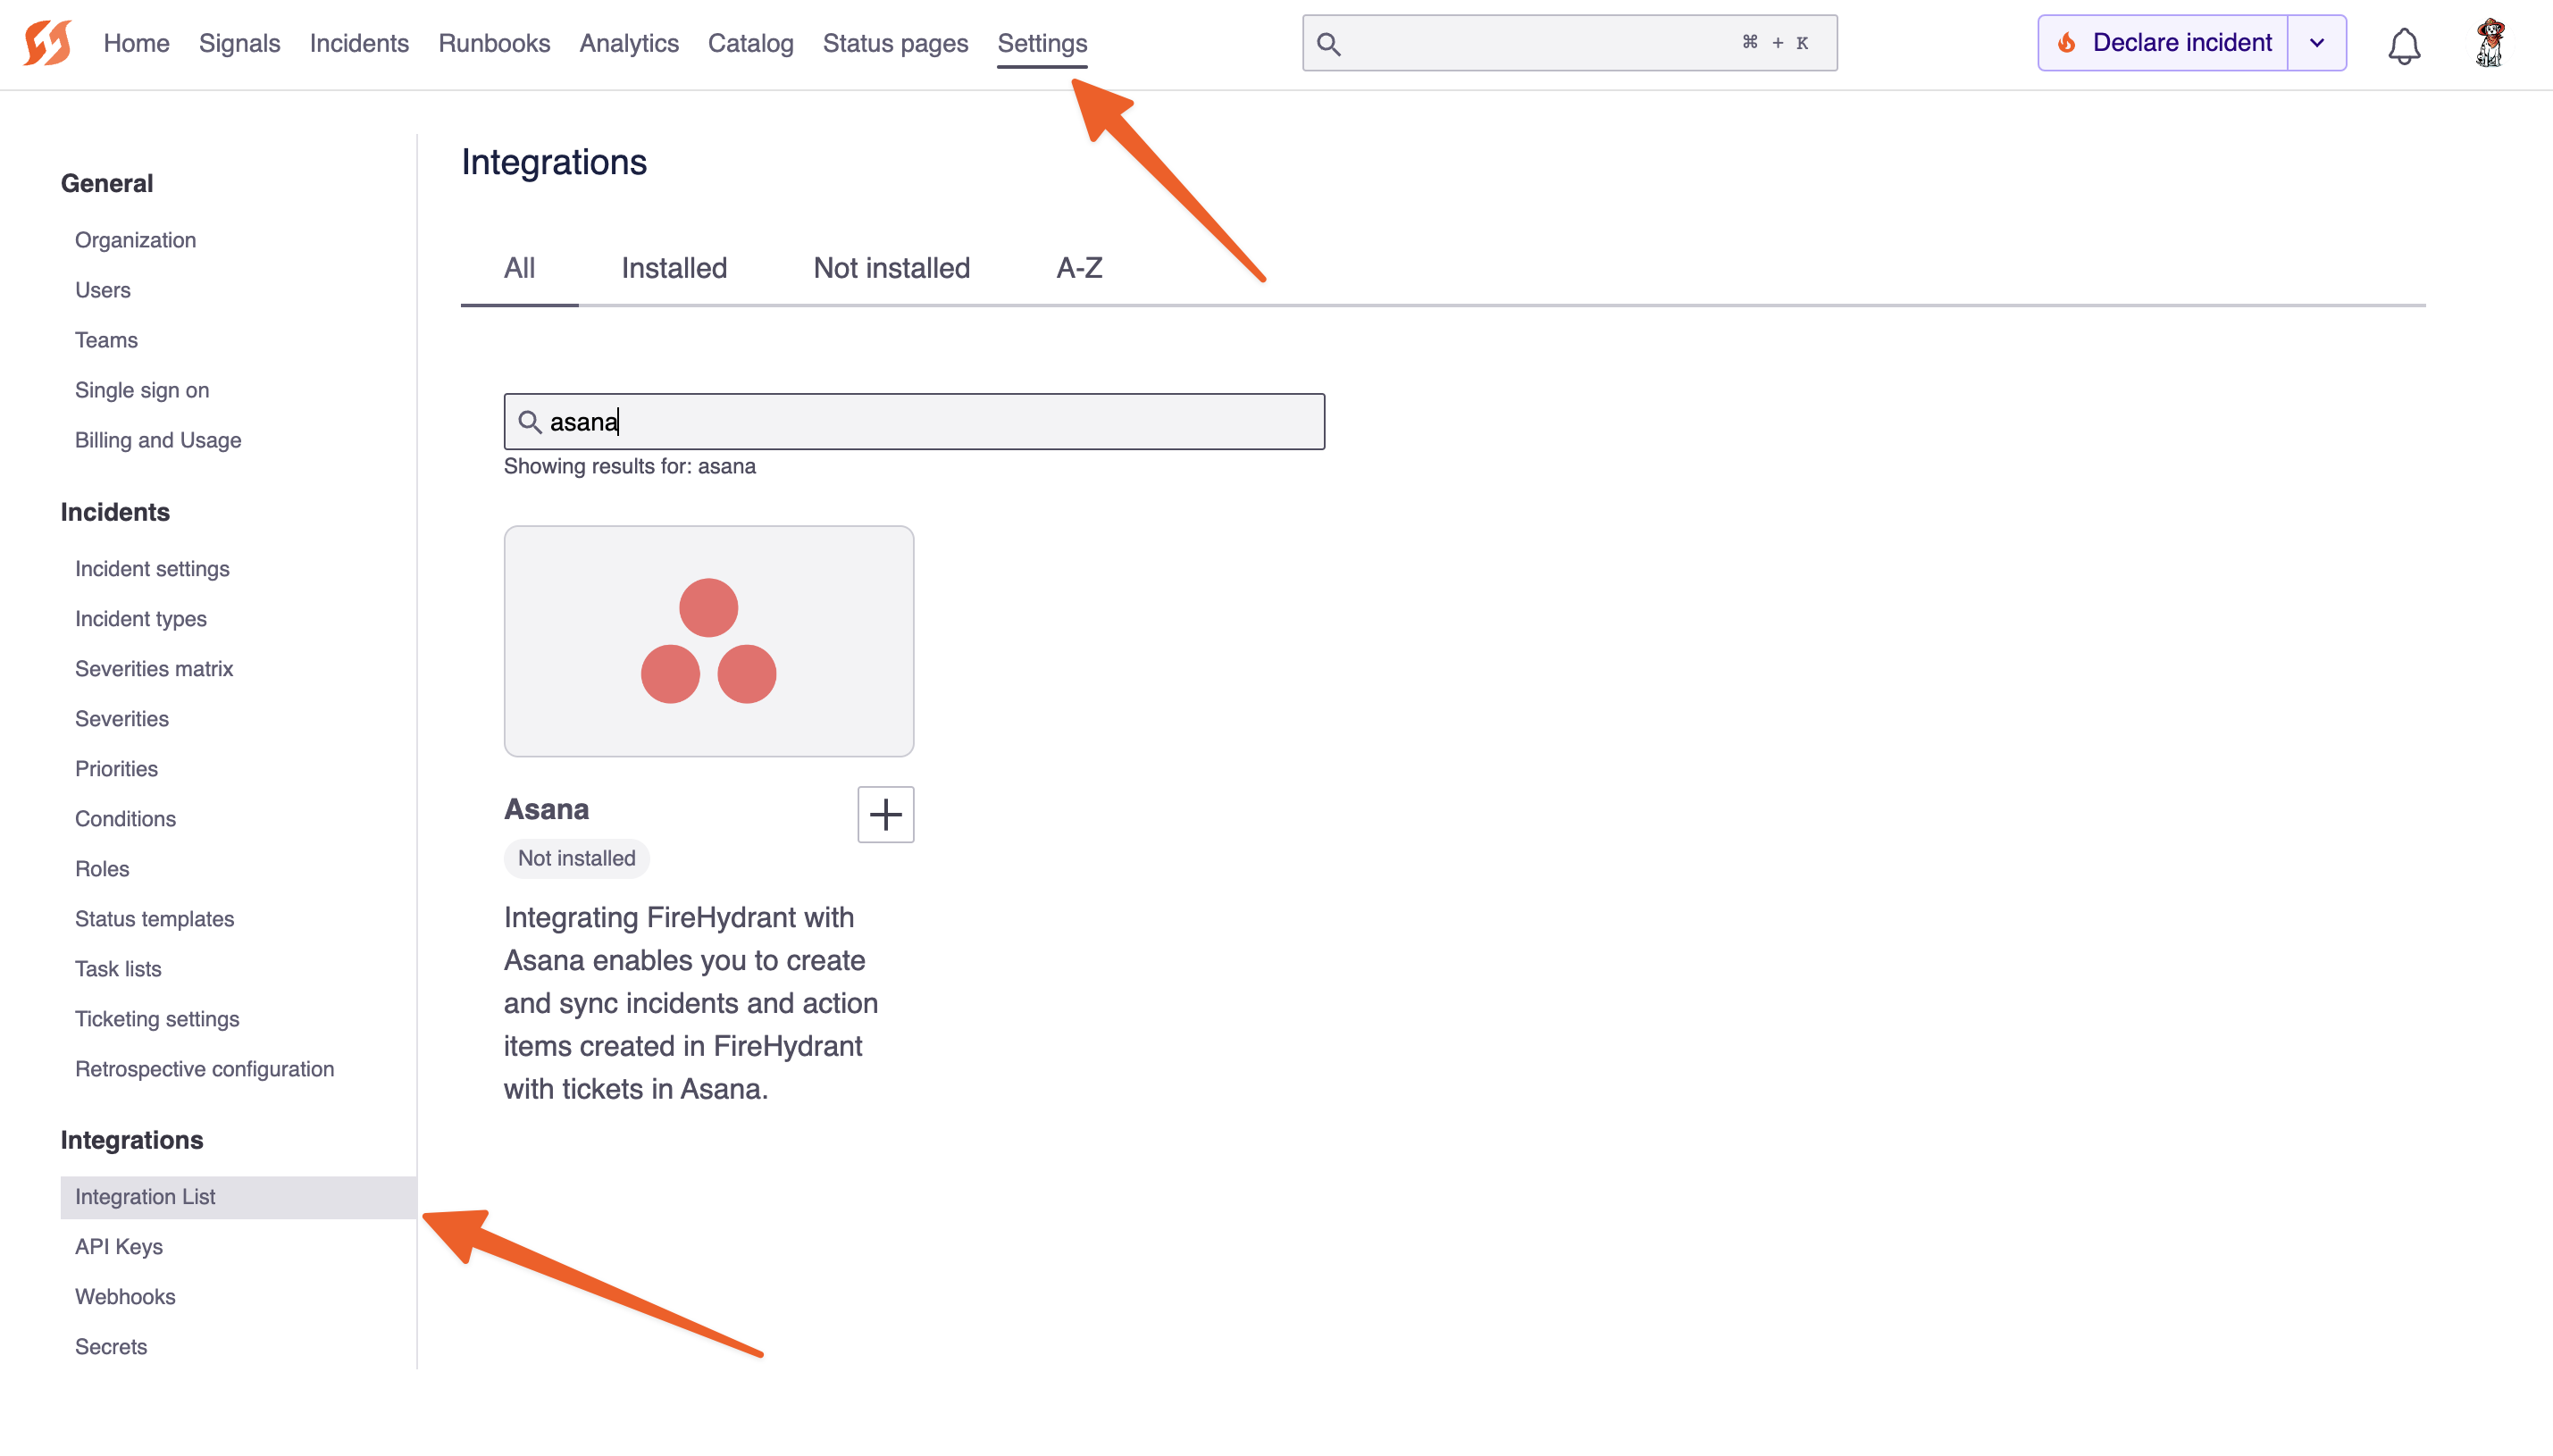
Settings -> Integrations -> Search 'Asana'
- Once here, click the
[ + ]button to kick off the OAuth flow between FireHydrant and Asana. You should see a screen that looks like this:
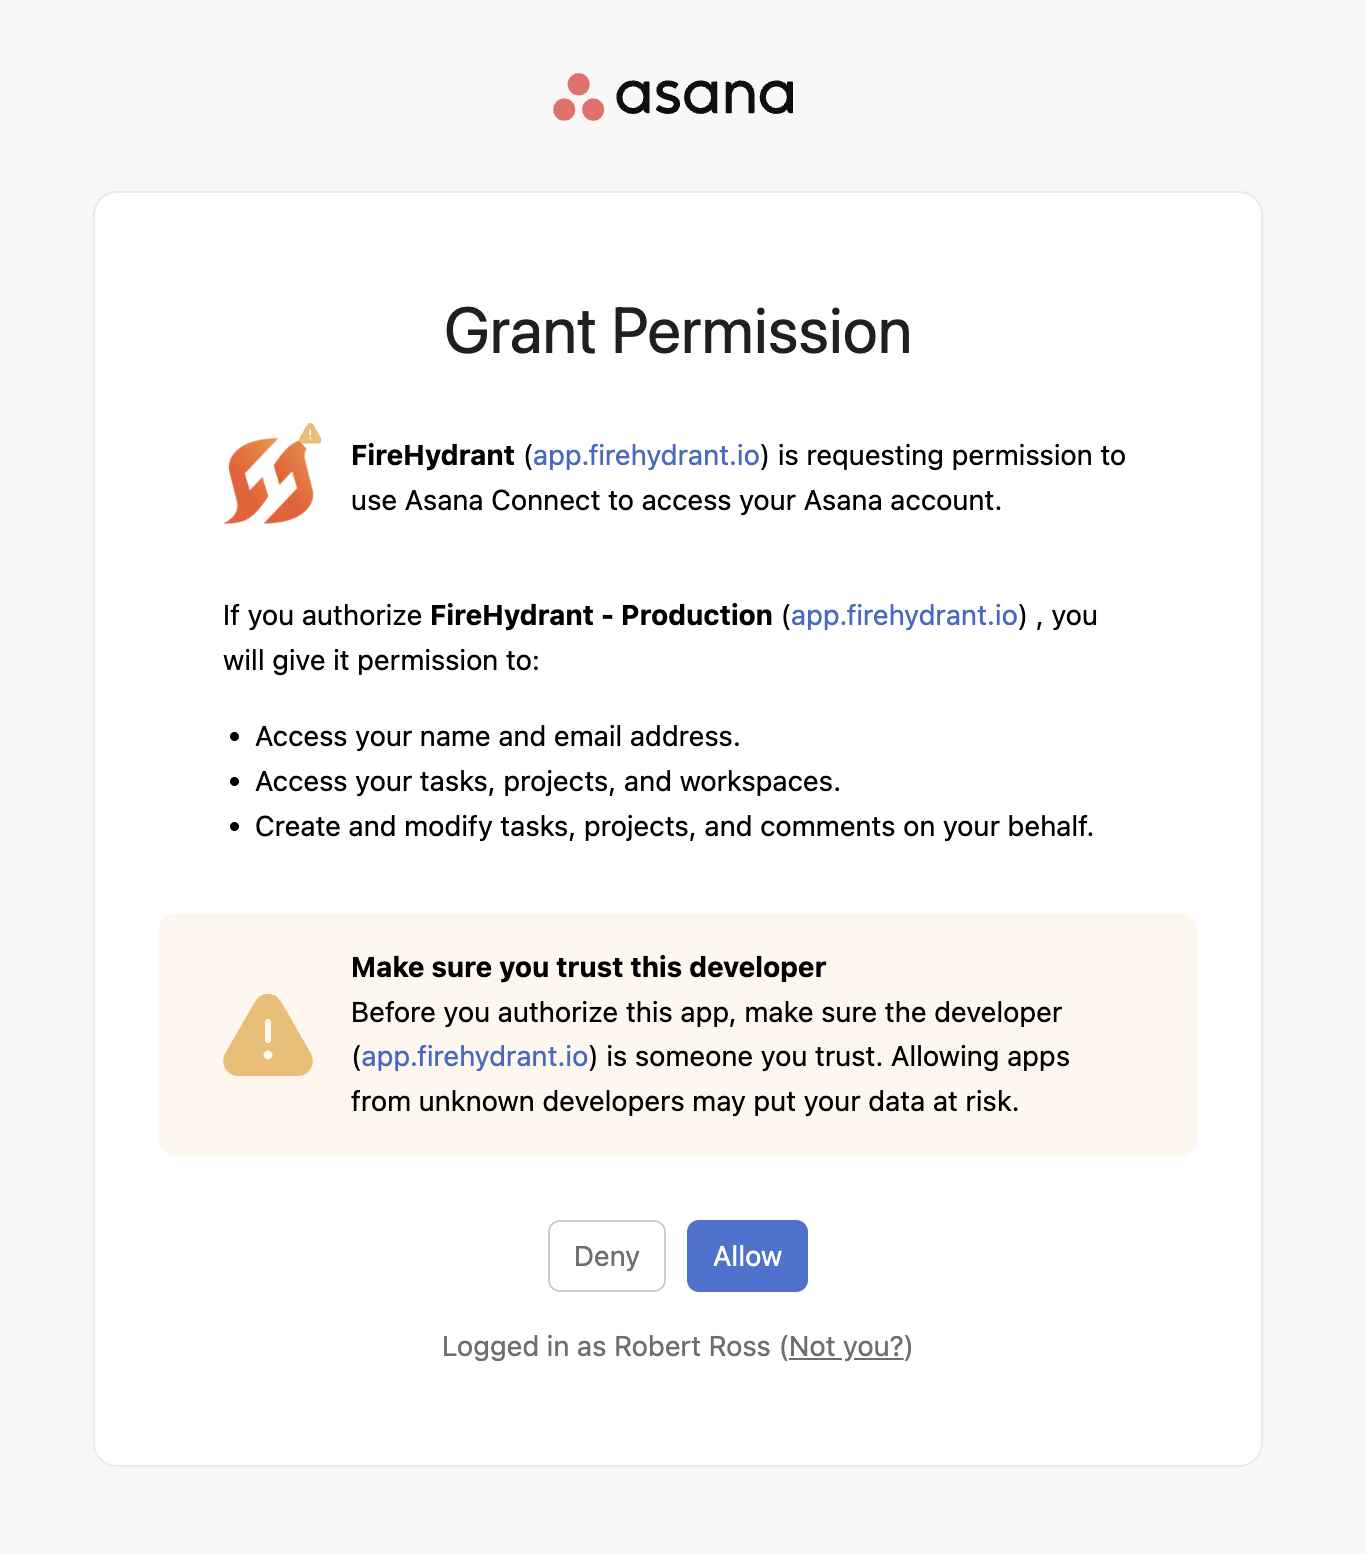
Authorize FireHydrant in Asana
- Once you've authorized FireHydrant, you'll be brought back to the integration page to see the new integration connected! 🙌
Configuring projects
Once FireHydrant has been authorized to Asana, you'll need to add projects in Asana to FireHydrant so that we can create and manage tasks appropriately. This is a mandatory step for the integration to work properly!
When you select the projects you want, it unlocks the ability to:
- Create incident tickets in Asana from a Runbook
- Create follow-ups in Asana from incident follow-ups in FireHydrant
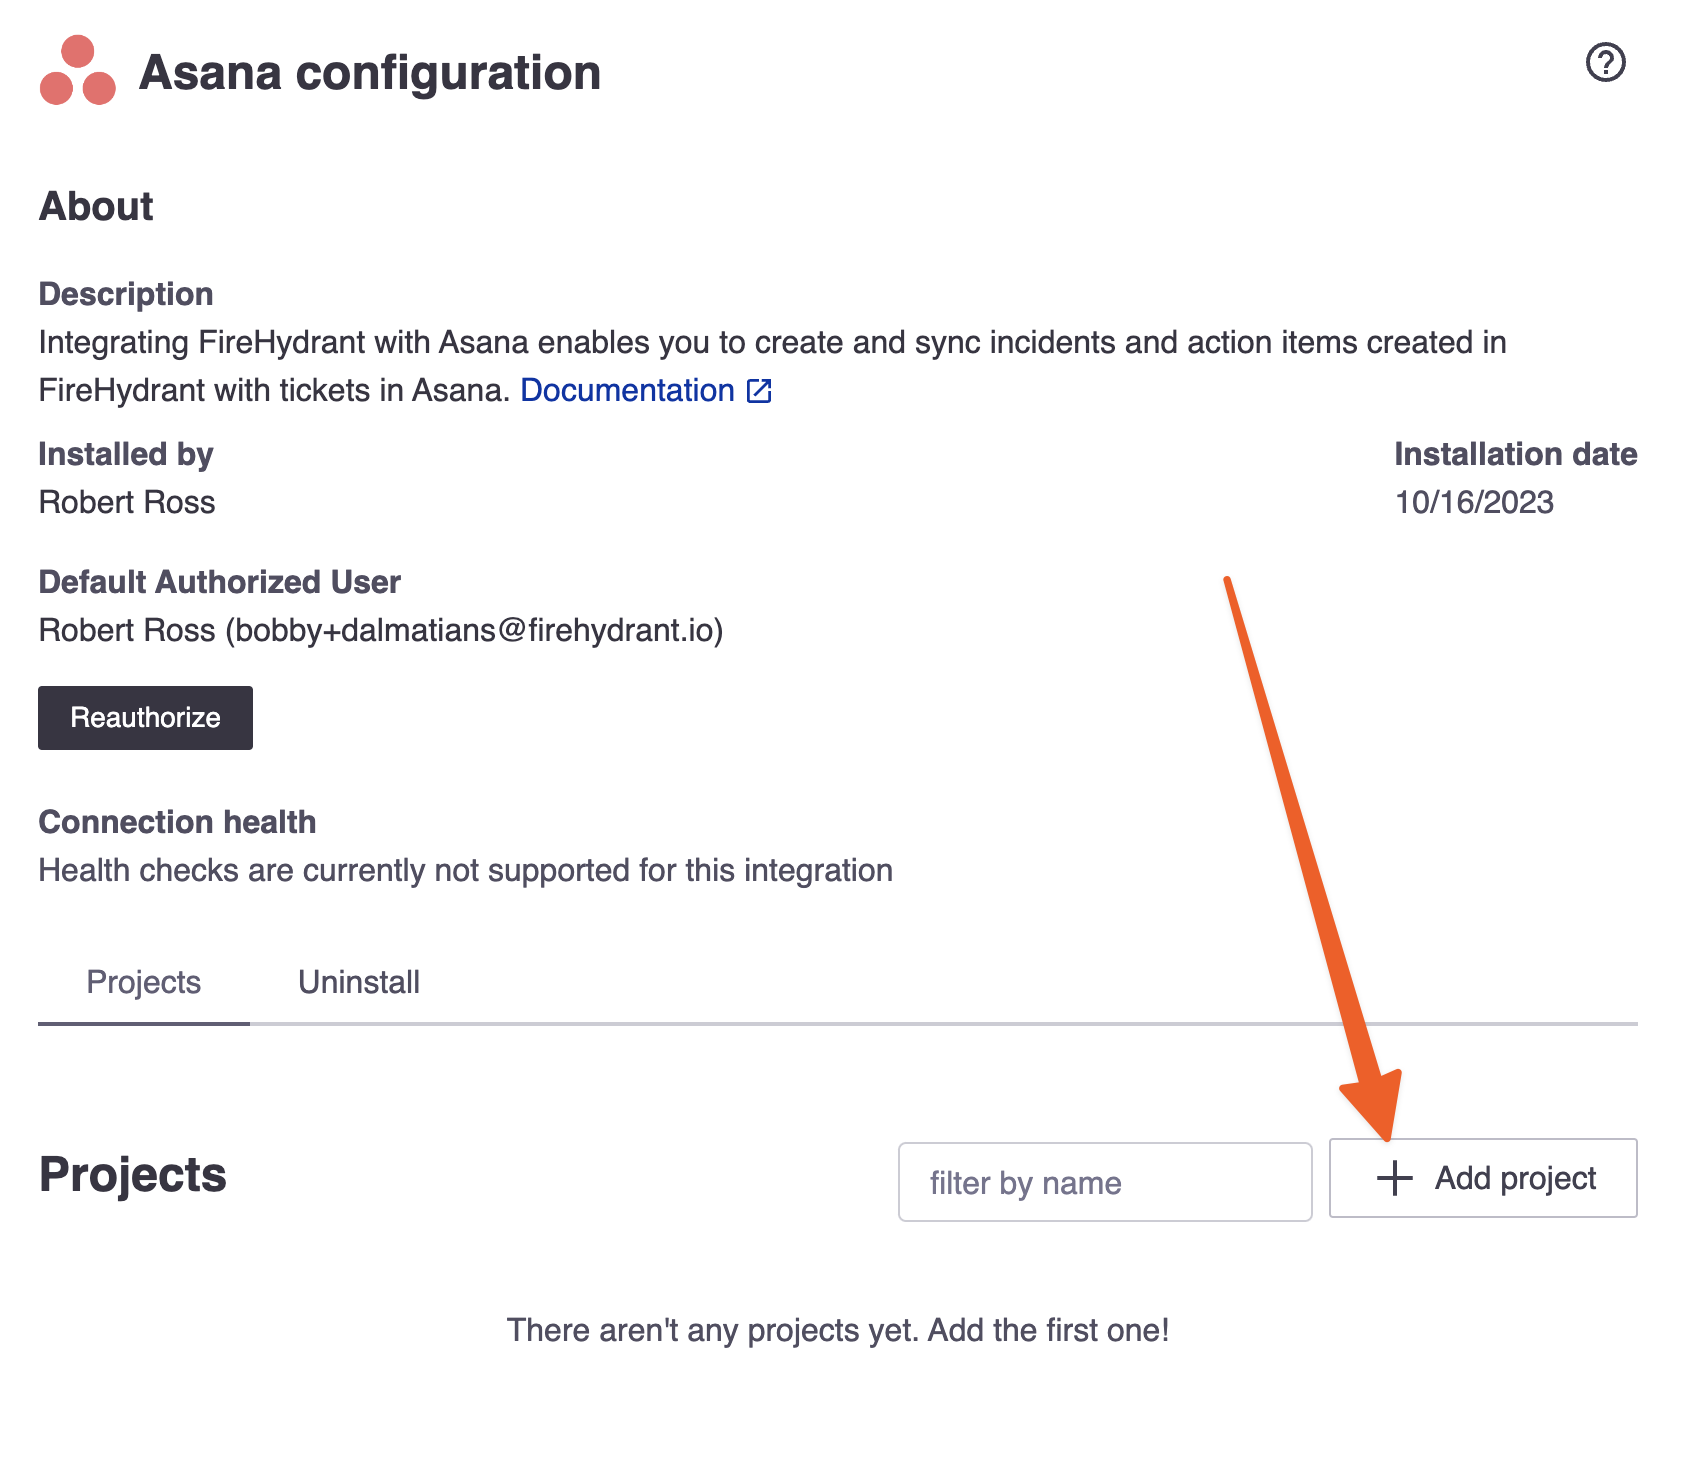
Add an Asana project to FireHydrant
(Optional) Custom field mapping
FireHydrant's incidents have numerous out-of-box fields as well as custom fields of information you can track. Subsequently, it may be crucial for organizations to map these FireHydrant fields to specific fields in the created Asana tasks, and FireHydrant's field mapping allows for this.
This step is also critical if your organization's Asana project(s) have custom required fields, in which case these mappings must be configured on FireHydrant so it can create tickets that pass the validations. Otherwise, the calls will fail.
If you do need to map fields, proceed with the following steps:
- Click '+ Add mapping' to create a new mapping.
- A drawer will come out on the right where you can select between two choices:
- Basic mapping allows you to always set fields in Asana to the same values.
- Advanced mapping allows conditional logic to map different fields to different values in Asana based on various parameters within FireHydrant.
- After picking basic vs. advanced mapping, you can select an Asana field to map.
- If Basic, you can set the field's value, and this will apply each time you create the ticket and whenever any detail on the incident is updated.
- If Advanced, you can select conditions and values that should apply when those conditions are met, along with an Else default value if no conditions are met.
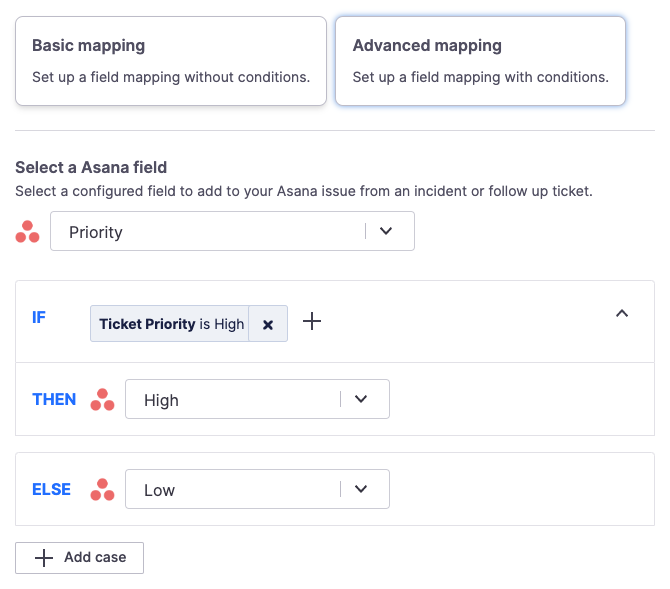
Mapping a field in Asana to a value
Note:
Field mappings for a project and its tickets are evaluated and applied upon every incident update. For example, if you have a condition to "set Asana task Severity field to
SEV1whenever the incident is isSEV1, otherwise default toSEV3," this will evaluate each time you make updates on the incident so that if the severity is escalated/de-escalated in FireHydrant, the field in Asana will also change accordingly.
Next Steps
Now that you've configured Asana, it's time to understand how to use it during your incident management:
- Look at the Create an Asana Task Runbook step to see how you can automatically create an Asana ticket for each incident
- Create follow-up tickets in Asana so you can schedule and prioritize work uncovered during incidents
- Browse the rest of our integrations
Updated 4 months ago