Splunk On-Call (VictorOps)
Note:
Splunk On-Call was previously VictorOps before acquisition by Splunk. The rest of this article refers to it as Splunk On-Call, but it may still be seen as VictorOps in parts of our platform.
FireHydrant's Splunk On-Call (formerly VictorOps) integration enables several capabilities within the platform:
- Automatically create FireHydrant incidents from Splunk On-Call alerts
- Notify different channels based on incoming alert content, such as routing keys
- Page out to teams and escalation policies in Splunk On-Call from FireHydrant
- Automatically pull in on-call responders from routing keys to incident channels
- Importing routing keys from Splunk On-Call into FireHydrant's Service Catalog
- ...and more!
Installation
Connecting Splunk On-Call to FireHydrant
To get started:
-
Go to Settings > Integrations list.
-
Search for the Splunk On-Call integration and click the '+' (this tile is still labeled "VictorOps" in the FireHydrant UI, although the product was acquired and renamed to "Splunk On-Call.")
-
Enter your Splunk On-Call Organization name.
-
Enter your Splunk On-Call API ID and an API Key. You can find and generate these on the Splunk On-Call Integrations page under the API tab. API ID is at the top, then the API Key is generated and shown in the list of API keys below.
- If you don't see this as an option in the UI, contact your Splunk On-Call administrator and Splunk support.
-
Enter your REST Endpoint Token.
- To find your REST Endpoint Token, go to Splunk On-Call's Integrations page and locate the REST integration. If the REST endpoint integration is not enabled, click the blue Enable button to generate your endpoint destination URL. For details, see the Splunk On-Call documentation.
- Under URL to notify, your routing key is included in the destination URL, between
/alert/and/$routing_key. It should look like a UUID. For example:
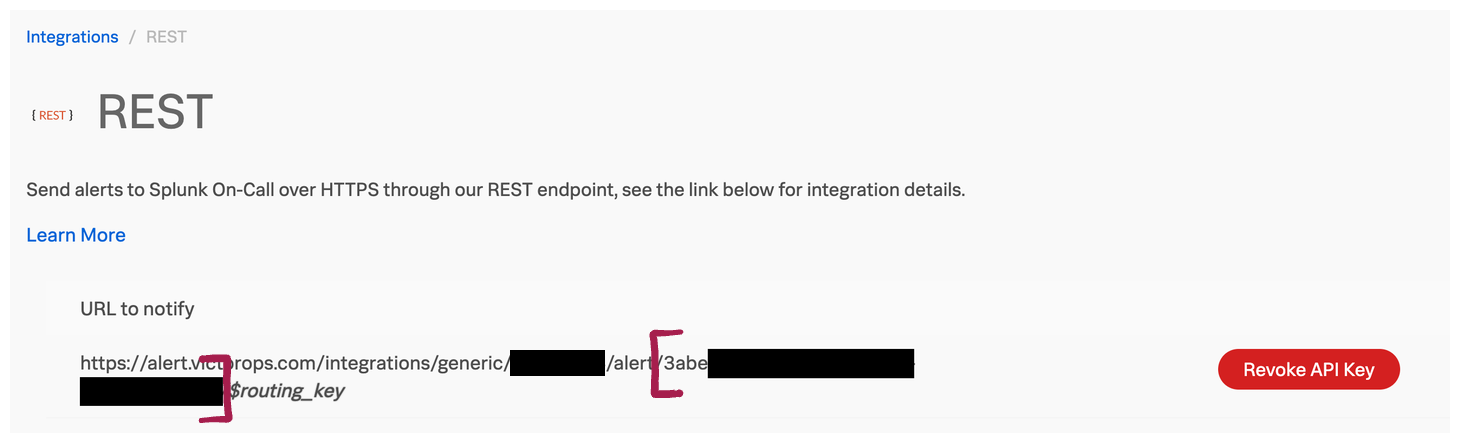
Splunk On-Call routing key between the red brackets
- Click Update Configuration. Now, Splunk On-Call will appear in your connected and available integrations list.
Set up Outgoing Webhooks
Note:
Splunk On-Call's Outgoing Webhooks require an Enterprise plan with Splunk On-Call. In addition, to view or modify them, you must have administrative credentials.
After configuring your integration in FireHydrant, you need to set up an outgoing Splunk On-Call webhook so FireHydrant can receive alerts and hooks.
- Return to the configuration page on FireHydrant by clicking the Splunk On-Call tile on the Integrations page. This opens your Splunk On-Call configuration details page, where a webhook URL has been generated for you.
- Copy the webhook address provided.
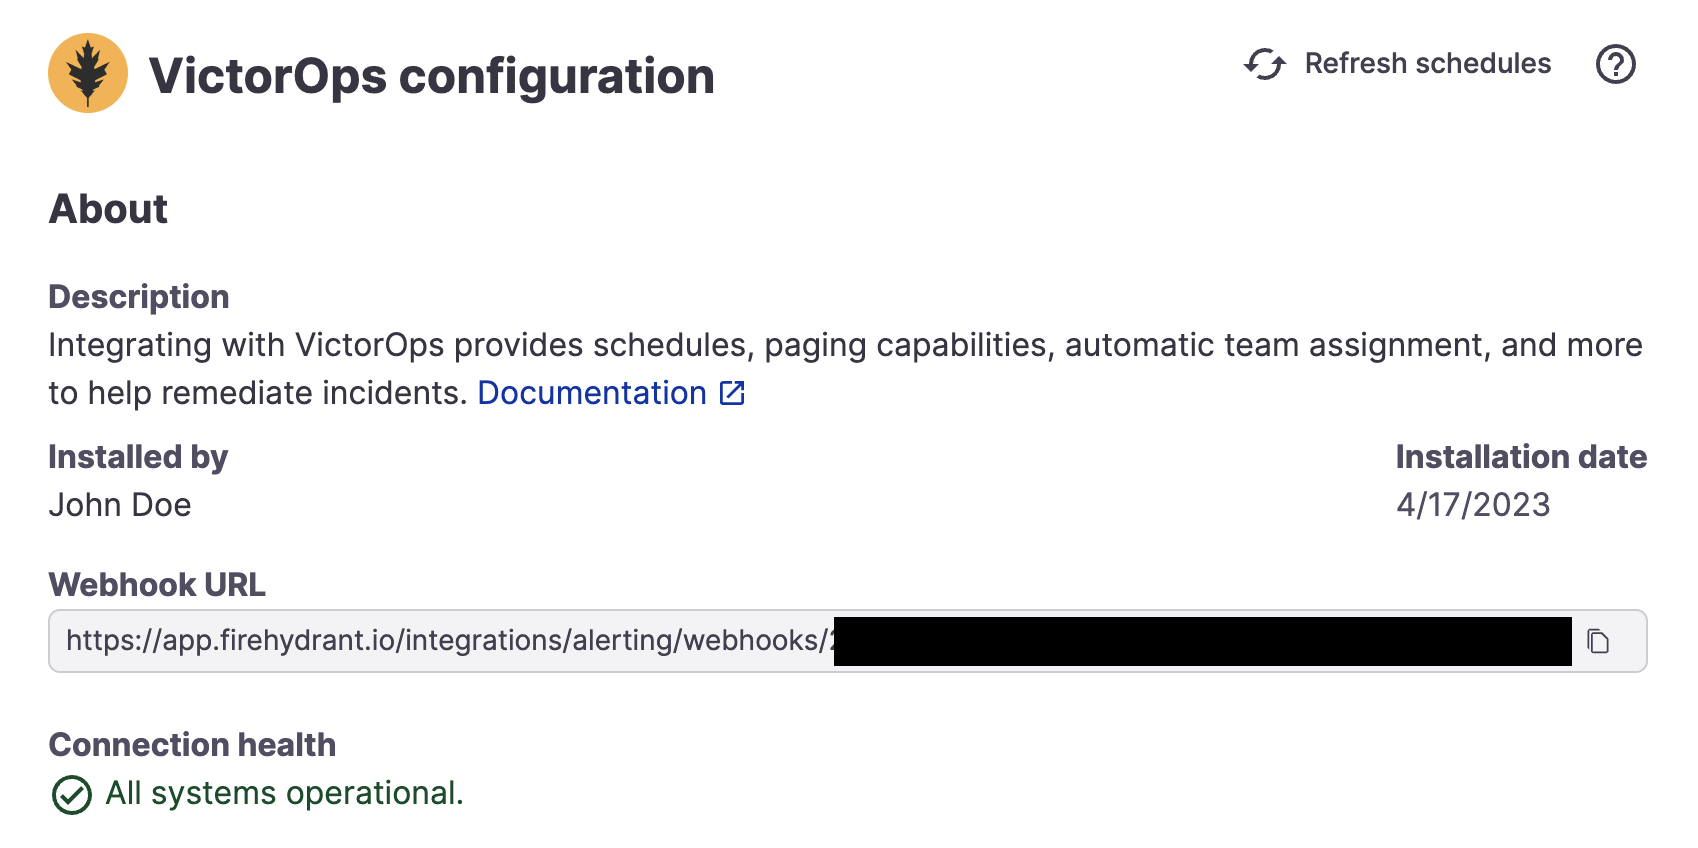
Generated webhook URL after installing Splunk On-Call
-
Go to your Splunk On-Call account at https://portal.victorops.com.
-
Click Integrations > Outgoing Webhooks.
- Note: This is not to be mistaken with Integrations > 3rd Party Integrations > Webhooks.
- If you don't see Outgoing Webhooks as an available tab under Integrations, try visiting this link directly:
https://portal.victorops.com/dash/YOUR_ORG/outgoing-webhooks. - If that also doesn't work, you may need to reach out to your Splunk On-Call admin and/or Splunk On-Call support.
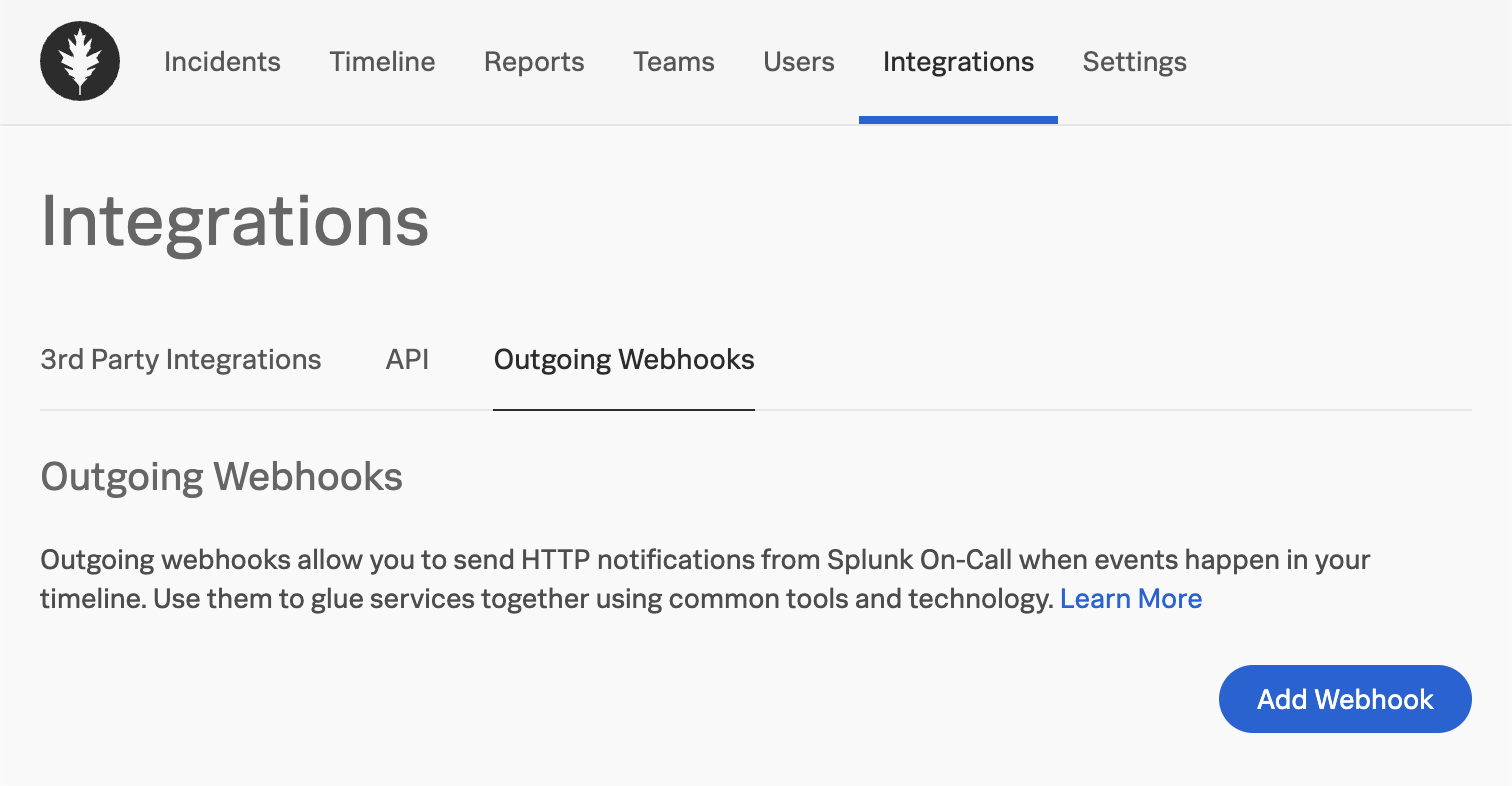
Outgoing webhooks tab in Splunk On-Call
- Click Add Webhook and enter in the following information:
- Name: Replace
Outgoing Webhookwith a more descriptive name, if you'd like. - Event: Select
Any-Incident. - Content Type: Leave as
application/json. - Custom Headers: No custom headers are needed.
- To: Paste the webhook URL copied in step #2 of this section.
- Payload: If you leave the payload empty, it should use the default.
- Description: Provide a detailed description for this webhook, if you'd like.
- Name: Replace
- Click Save to create the new webhook.
Checking the installation
Once you've completed the Installation and Webhooks setup sections above, you should have a default routing rule for Splunk On-Call to notify the configured Slack alert channel.
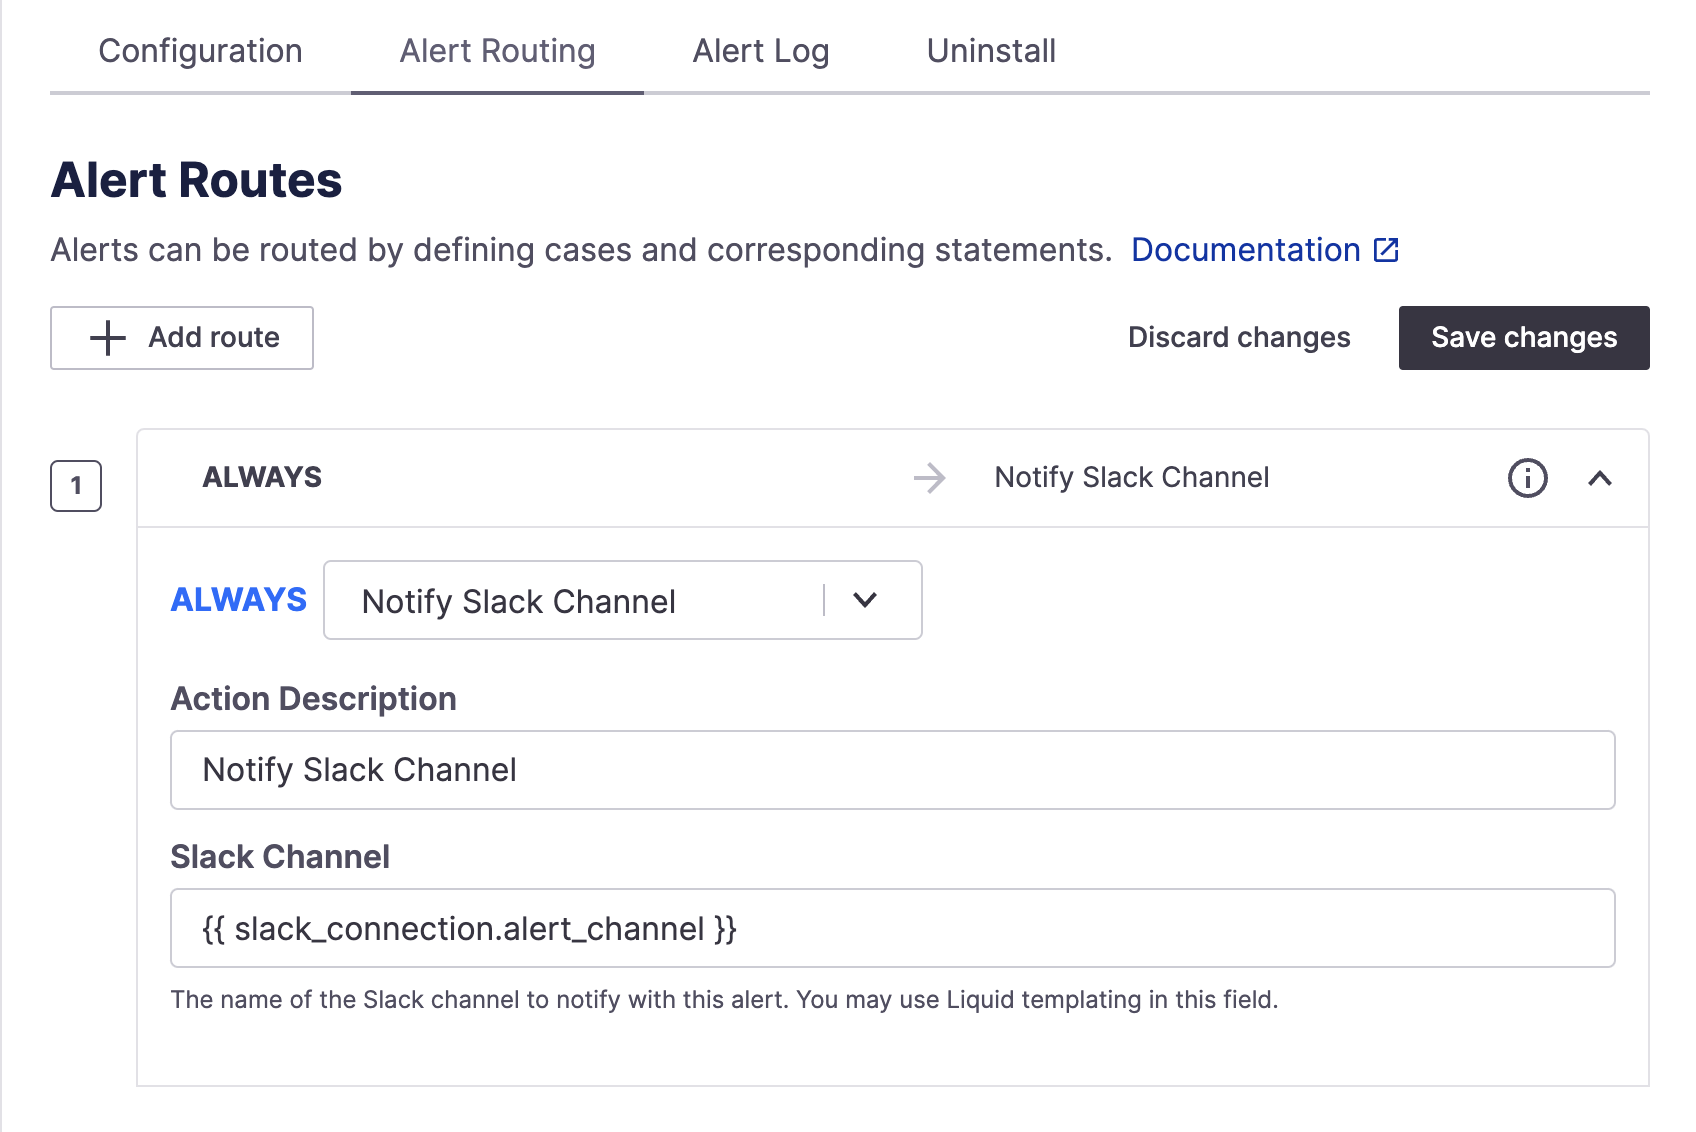
Default alert route to notify configured alerts Slack channel
In your Slack integration settings, make sure you have a channel set for alerts and that the @FireHydrant bot is invited to it.
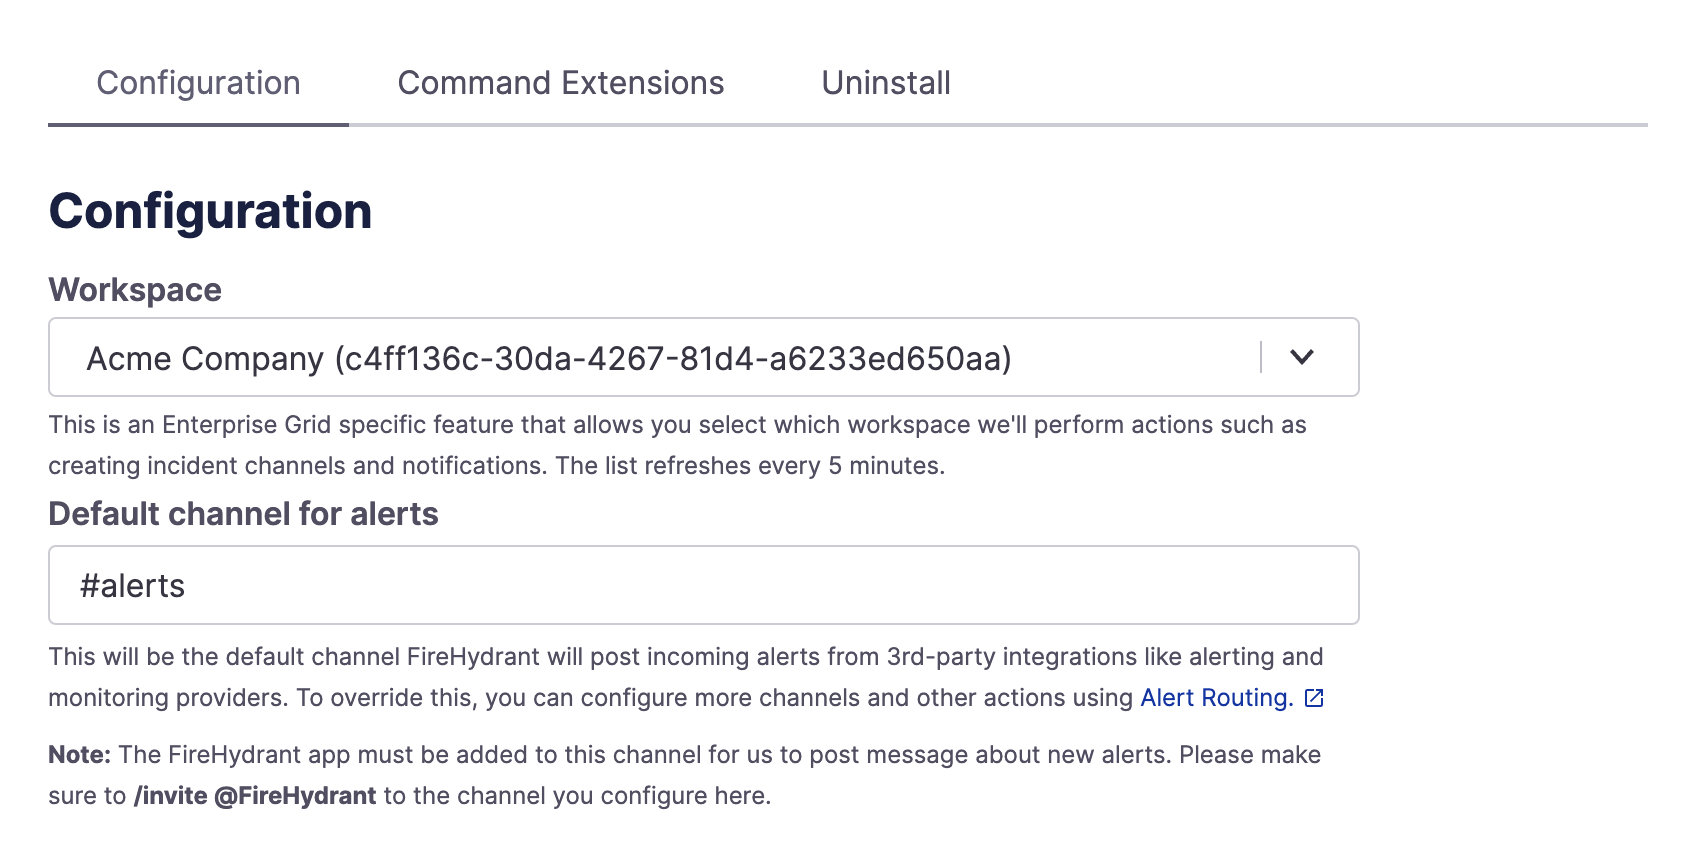
Slack Default channel for alerts setting
With the above prerequisites, creating an alert in Splunk On-Call should now post an alert to the appropriate Slack channel!
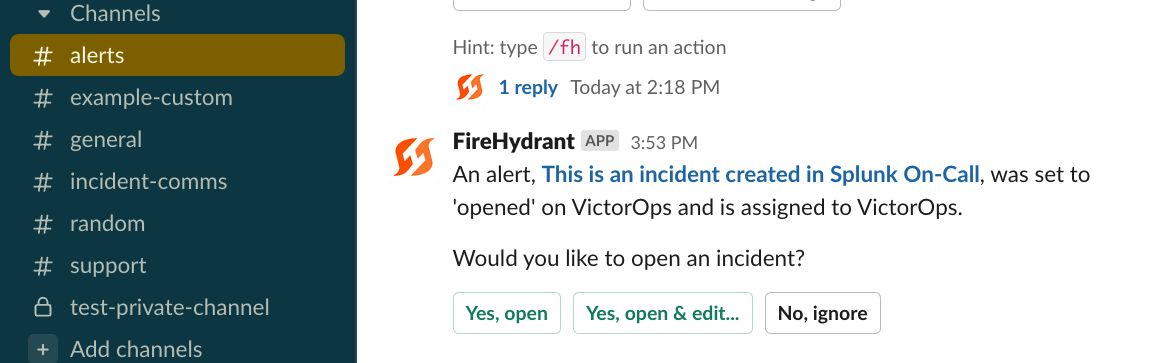
Receiving the alert in Slack from a new Splunk On-Call alert
Splunk On-Call Alert Routing
Once your Splunk On-Call instance is configured, you can set up Alert Routes to take action on your alerts based on the data included in the alert. You can automatically open new incidents, send alerts to any Slack channel, log an alert in FireHydrant, or simply ignore it. To learn more, read about Alert Routing.
The rest of this document details parameter mappings for alert routes and provides additional resources for the next steps to harness the power of Splunk On-Call with FireHydrant fully.
Parameter Mappings
Here is the table of routable parameters on FireHydrant and the corresponding key/value from the inbound Splunk On-Call webhook(s). The $ refers to the webhook body content as a JSON object.
An explanation of Splunk On-Call's Outgoing Webhooks can be found in their docs here.
| Parameter Name | Notes |
|---|---|
| request.body.ALERT.fh_catalog_ids | An additional parameter you can configure from the Splunk On-Call Outgoing Webhooks. People generally will use this to send over catalog item UUIDs, but this requires explicit configuration rather than just using the default. See Step #5 of the Outgoing Webhooks section above. |
| request.body.INCIDENT.INCIDENT_ID | The incident number/ID as assigned by Splunk On-Call. |
| request.body.INCIDENT.CURRENT_PHASE | The current phase of the incident as specified by Splunk On-Call. Values (as of this document's writing) are UNACKED, ACKED, and RESOLVED. |
| request.body.INCIDENT.INCIDENT_TIMESTAMP | The time of incident creation in millisecond epoch time. |
| request.body.ALERT.routing_key | The routing key of the alert created in Splunk On-Call. |
| request.body.ALERT.state_message | The title of the alert as it was created in Splunk On-Call. |
| request.body.INCIDENT.SERVICE | Should be the title of the alert, same as state_message above. |
The following table shows our overall Alert Routing mapping object - these parameters are standard across all Alerting/Monitoring integrations.
| Parameter Name | Notes |
|---|---|
| Alert Summary | The same as INCIDENT.SERVICE above |
| Alert Description | The same as ALERT.state_message above |
| Alert Priority | Maps to nothing for Splunk On-Call. |
| Alert Status | Aligned with INCIDENT.CURRENT_PHASE above. If the incident is ACKED in Splunk On-Call, then this value is Acknowledged on FireHydrant. If it is RESOLVED on Splunk On-Call, then it is Resolved on FireHydrant. |
| Alert Associated Infrastructure | The associated Service/Functionality in FireHydrant. In order for us to detect this, you must have linked a Service or Functionality to a Routing Key in Splunk On-Call. |
Next Steps
Now that you've configured the Splunk On-Call integration, you can take next steps to get the full power of FireHydrant + Splunk On-Call:
- Import and Link Components into your Service Catalog from Splunk On-Call routing keys
- See how you can page and lookup on-call personnel in PagerDuty
- Automatically create Splunk On-Call alerts via Runbook step
- Configure teams to pull personnel from on-call schedules
Updated 4 months ago