Usage
Note:
This article is about FireHydrant's built-in status pages. For information about Atlassian Statuspages, visit Atlassian Statuspage documentation instead.
Once you've configured your FireHydrant status page, you can use it to post incidents and updates in various ways.
Creating incidents on status pages
Automatically via Runbook step
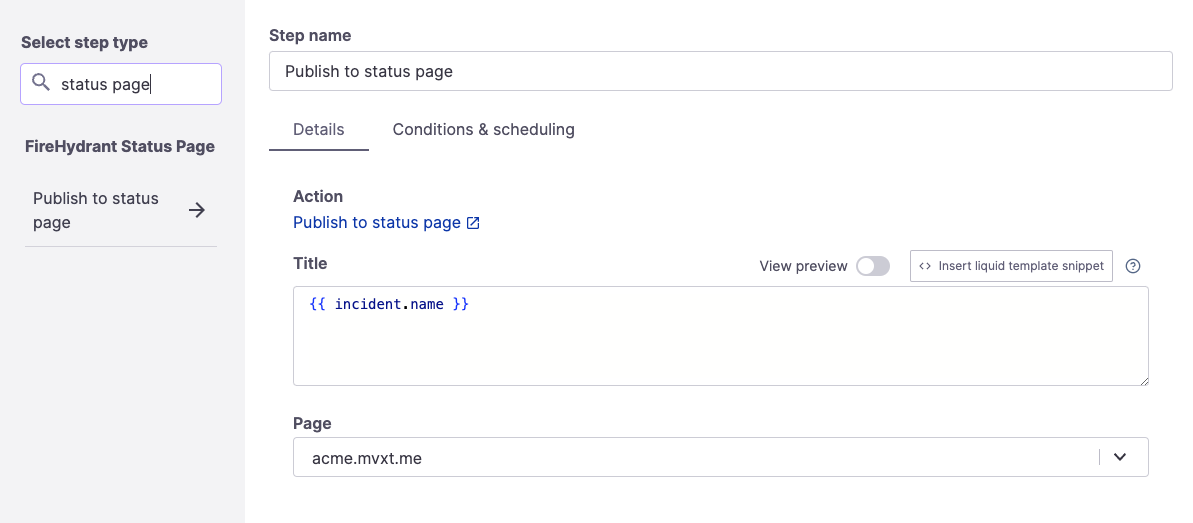
Publish to status page (FireHydrant) step
You can use a Runbook step to automate publishing an incident to your status page.
- On your Runbook edit page, click '+ Add Step' and search for 'status page.'
- Click 'Publish to status page' under FireHydrant Status Page.
- Fill out the details here and select the page you want to post to.
Note:
You can post to multiple status pages by using mulitple different Runbook steps for each.
This runbook step will automatically post the incident to the status page and mark the appropriate component(s) as impacted if they are on the page.
Manually via Slack and UI
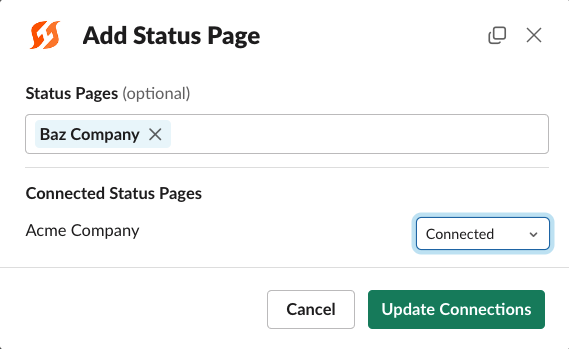
Slack modal to manage connected status pages for the incident
From Slack, you can do this with the /fh add status-page command.

Status Pages tab on an incident
On any incident's home page, you can add a status page manually:
- In the Command Center for the incident, click on the 'Status Pages' tab or select 'Status Pages' from the dropdown if on a smaller window.
- Click '+ Add' next to the status page you want to post to.
Note:
Incidents posted to FireHydrant's status pages will be visible regardless of whether they are private or public. If you do not want private incidents posted to external status pages, ensure your private Runbooks do not have steps to post to status page, and ensure your responders are trained not to manually attach external status pages on private incidents.
Posting updates
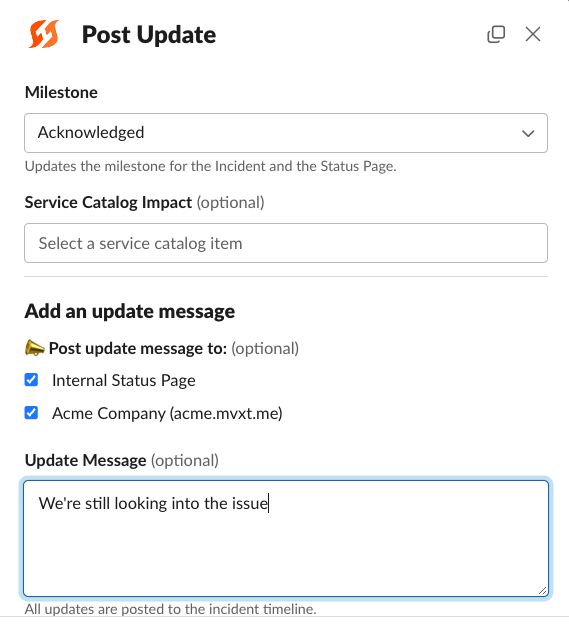
Using the /fh update modal to post an incident update that also propagates to selected status pages
After an incident is posted to status page (see above sections), you can use multiple methods to update the incident on the status page.
- You can publish an update to the status page as a direct part of your normal flow to update from Slack. Learn more by visiting Posting Updates.
- You can also publish an update to the status page directly from the Command Center UI.
- Go to the 'Status Pages' tab or dropdown in the Command Center.
- Click on 'Add an update' next to the status page you want to post to and fill in the details to post.
Removing incidents
If you would like to remove an incident from a status page, you may do so in a couple of ways:
- If you want to remove the incident from the status page but keep the incident in FireHydrant, navigate to that incident's Command Center and click the Status Pages tab. Click the trashcan next to the status page where you want to remove the incident.
- If you want to remove the incident from the status page and from within FireHydrant, you can archive the incident.
- When converting an incident from public to private, you are presented with a checkbox to automatically remove the incident from the attached external status page (if one existed before conversion).
Retention
FireHydrant's status pages retain incidents indefinitely so long as:
- The incident still exists within your internal FireHydrant account (e.g., it isn't archived)
- The connection between the FireHydrant incident and the status page is maintained (see previous section on removing incidents from status pages).
Updated 3 months ago