
This is a post about the other kind of hacking.
Don’t get me wrong; we here at FireHydrant love and support our hackers, and if we could help you do the Hollywood kind of hacking, we’d be all over that. You’d have better hair, a cool van, and the ability to make obviously mechanical typing sounds from an obviously non-mechanical keyboard right before you magically turn off all the security cameras for 3 blocks and convince building security you’re the Ambassador to Paraguay (it makes sense if you follow the plot).
Sadly, we can only help with the other kind; the kind where you have a few wires, a battery, a tube of toothpaste, and a roll of duct tape and you need to make… something. We’re not even sure what you’re going to make, and it may not make sense to anyone else, but it does exactly what you need it to.
In that spirit, while working on the latest batch of features for FireHydrant Signals, I got to talking with Robert, our Chief Hacking Officer. “What if, instead of alerting me via my phone or email, I could have an alert that could turn on the lights, start the coffeemaker, and kick me out of bed?”
After a small amount of discussion about the brand of smart mattress I would need and how best to rewire my coffeemaker, we got serious and figured there was a pretty simple thing we could add to make it possible to hack the rest of this together. And thus Hacker Mode was born.
What is Hacker Mode?#what-is-hacker-mode
Hacker Mode is a scrapable endpoint that tells you (an individual FireHydrant user) if you have any alerts that should be contacting you right now. That could be because you’re part of an active escalation policy, because you’re on call for your team, or because someone is trying to send an alert to you directly. Whatever the reason, if there’s something we’re trying to notify you about, you can check this endpoint and get a simple yes or no.
Why is this a big deal? If we’re hacking something together, we need a way to trigger it once it’s all connected. We could set up some kind of static endpoint on our home network or create some kind of bridge with a cloud provider that FireHydrant could push data to, but those things involve a lot of specific knowledge about your setup and are prone to security errors (something we take very seriously around here). So instead we let you do something far simpler; just poll your own hacker mode endpoint every 5 seconds or so and see if you need to do anything. The setup is far easier and your home network stays secure.
How do I turn it on?#how-do-i-turn-it-on
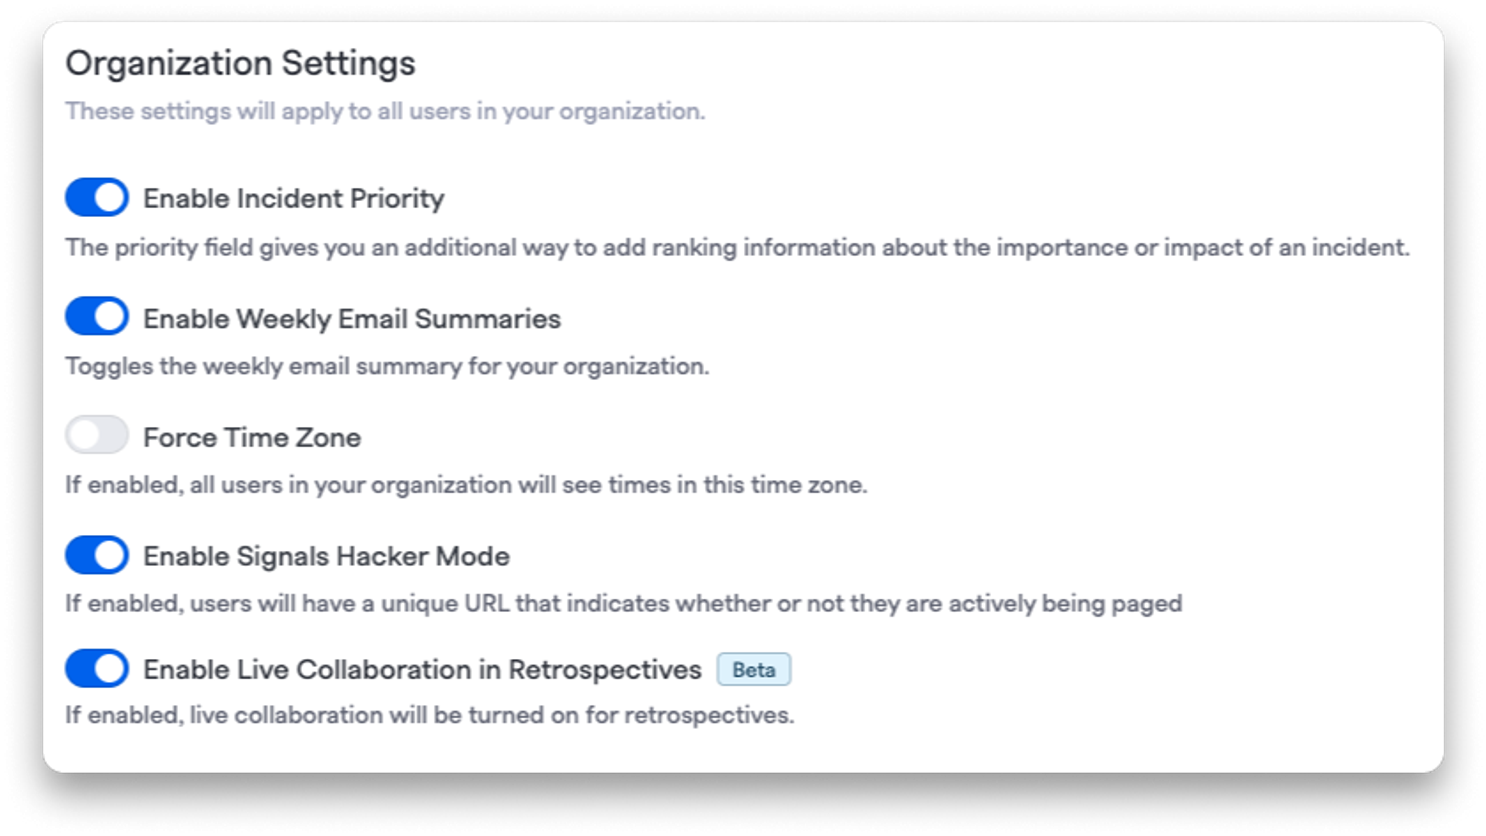
First, your organization will need to enable Signals Hacker Mode. One of the organization owners can go to the Settings page (the gear icon in the upper right), scroll down on the General > Organization page and make sure the toggle for Enable Signals Hacker Mode is on:
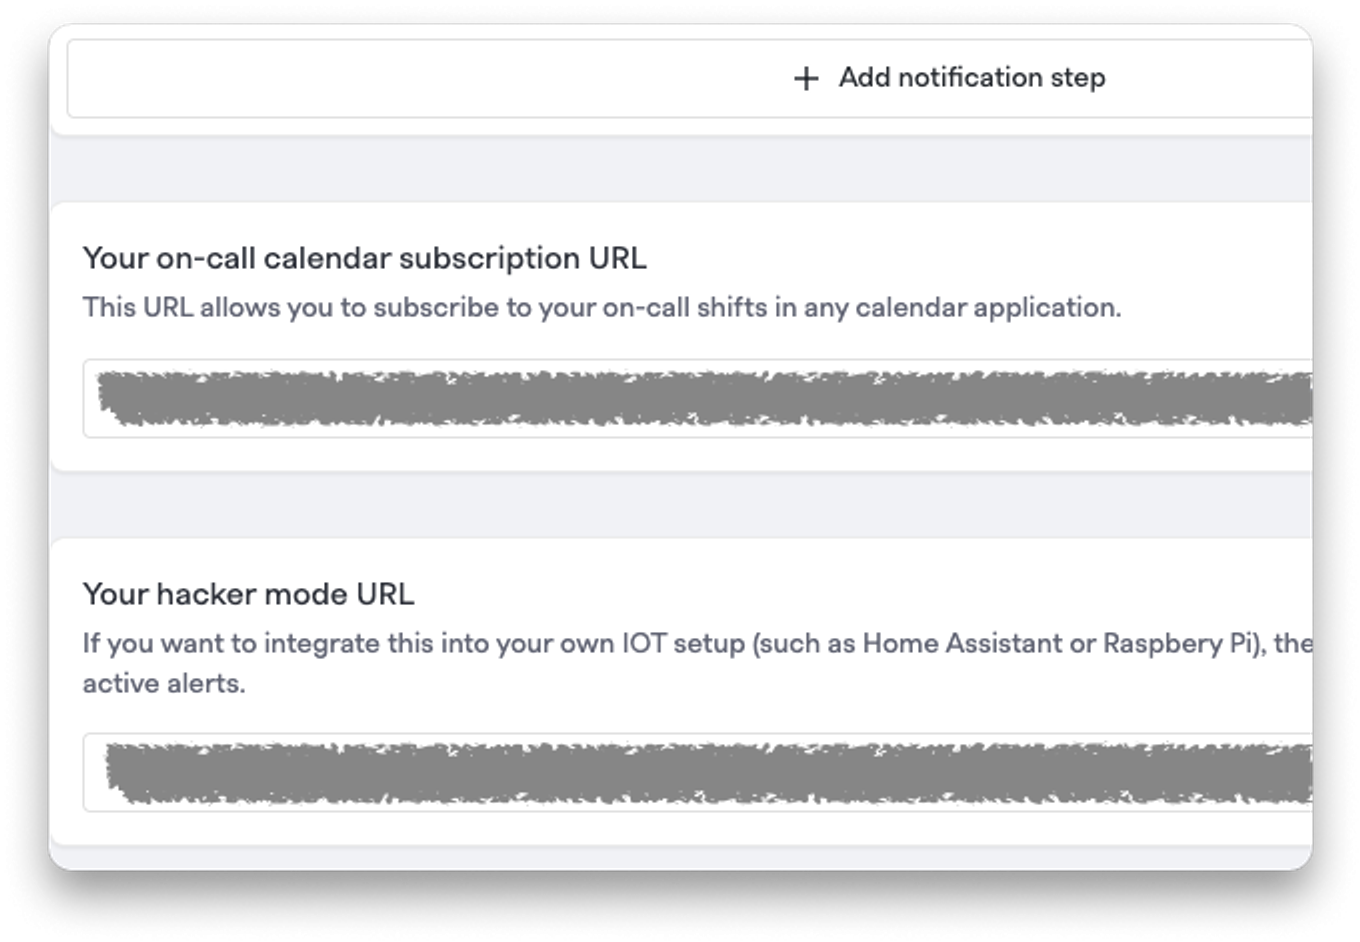
After that, you'll find your personal Hacker Mode URL on the bottom of the Signals Notifications tab of your account page:
Once you have this, you're ready to go! You can test your Hacker Mode URL via curl and see it return no_active_alerts if everything is clear or has_active_alerts if you have an alert in the opened state, whether you were targeted directly, via a Team, or via an Escalation Policy. You can test sending yourself an alert via the Send Alert button at the top of the web application.

So now I can hack stuff?#so-now-i-can-hack-stuff
Yes! Let’s put together a straightforward example that can flash some lights when you have an alert. This requires a minimum of parts and doesn’t assume you have any kind of home assistant or other hub for smart devices, or any experience with electronics. You’ll need the following:
- An ESP32C3 Super Mini microcontroller Datasheet Purchase
- A Seeed Studio XIAO ESP32C6 microcontroller Datasheet Purchase
- A USB-C data cable (some charging cables won’t do data transfer, so you may need to experiment, but you probably own one)
- A breadboard and a few jumper wires Purchase
- A Zigbee-compatible RGB smart lightbulb Purchase
- The code in this github repo
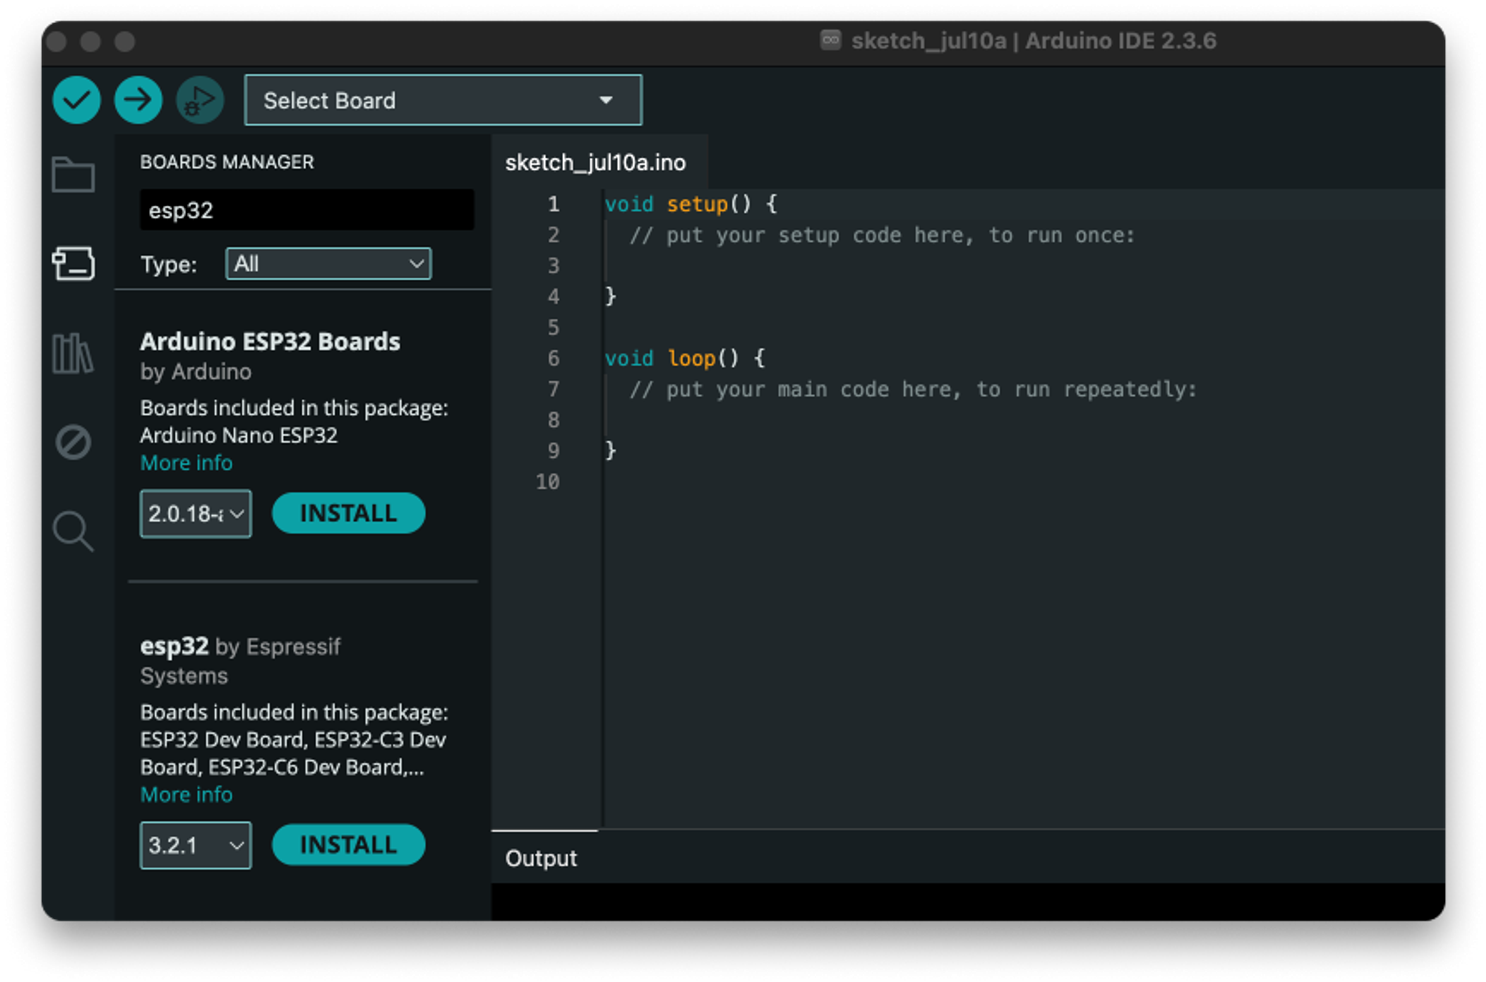
If this is your first time programming a microcontroller, you’ll need to install the Arduino IDE (currently version 2.3.6). Once you have that, you’ll also need the libraries for the boards we’re going to use. They can be found in the esp32 by Espressif Systems package in the boards manager:
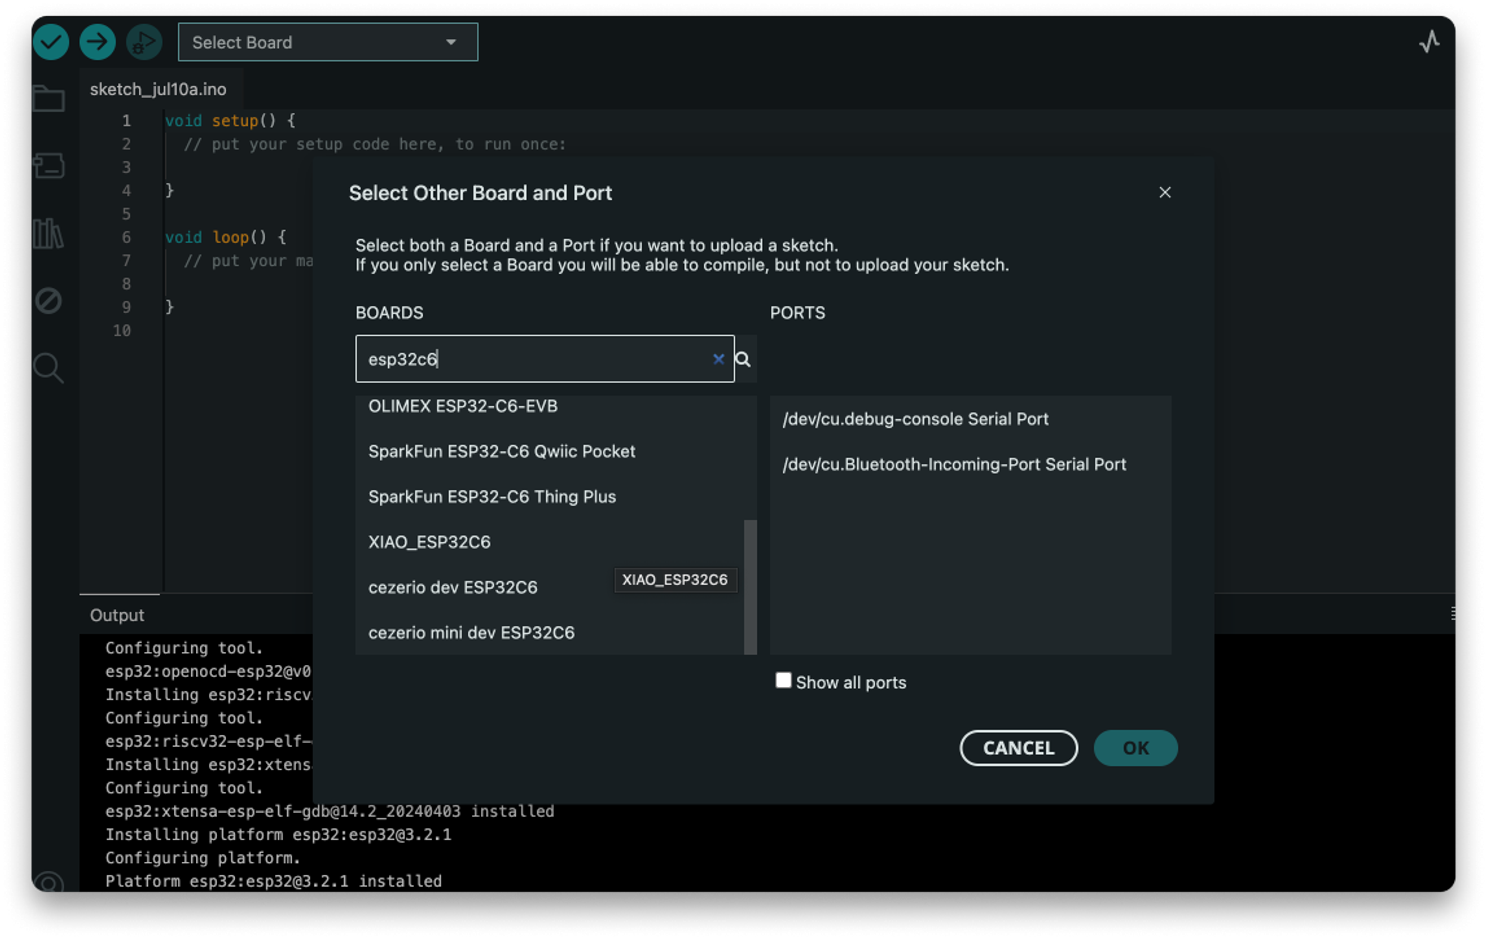
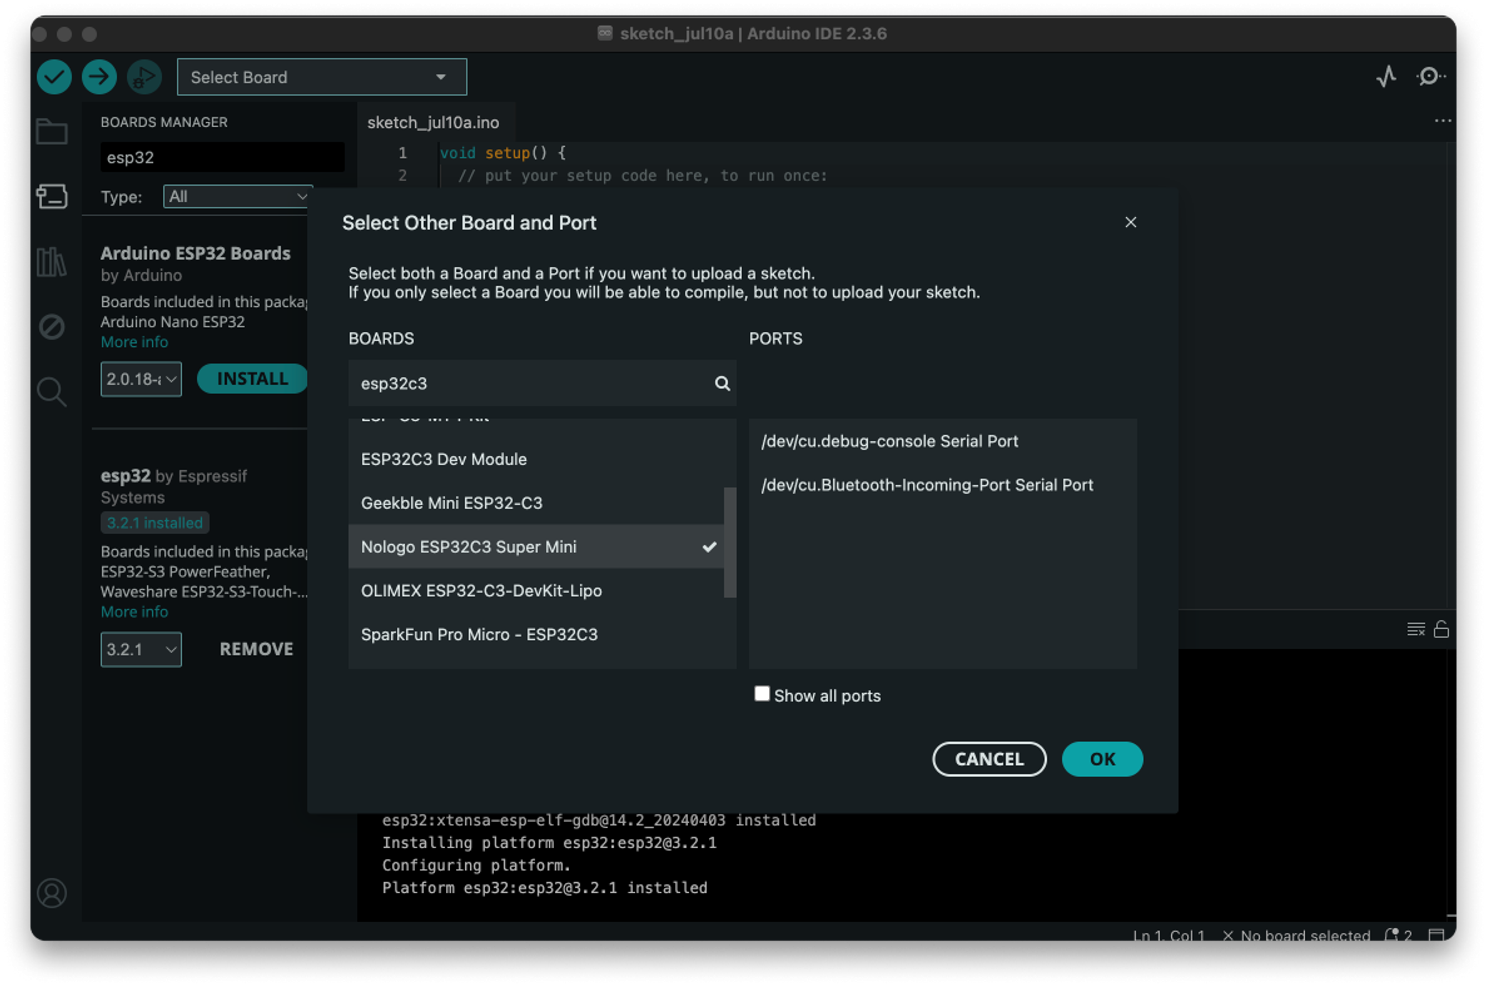
Once you have the package installed, you’ll need to connect the first board to your computer with a USB cable and choose Select other board and port… from the drop down at the top of the IDE. Let’s start with the ESP32C3, which shows up as “Nologo ESP32C3 Super Mini.” Note that you won’t be able to select a port until the board is actually plugged in!
This board is going to handle connecting to WiFi and polling our Signals Hacker Mode endpoint. When it detects an alert (specifically, the has_active_alerts message), it’ll send a signal to one of the GPIO pins (by default, pin 3) and set its voltage from LOW to HIGH. You’ll find the code to do this in the GitHub repo for this project here.
Copy the code for wifi.ino into your arduino IDE, and then you’ll need to update a few lines. Lines 5 and 6 will be the ID and password for your WiFi network. Line 10 should be updated with the path for your Hacker Mode URL. Note that this is the path only, which is everything after https://app.firehydrant.io/ in the Hacker Mode URL box. Once you’ve made those changes, you can click the Upload button at the top of the IDE. This will take a minute while the sketch compiles and uploads to your board.
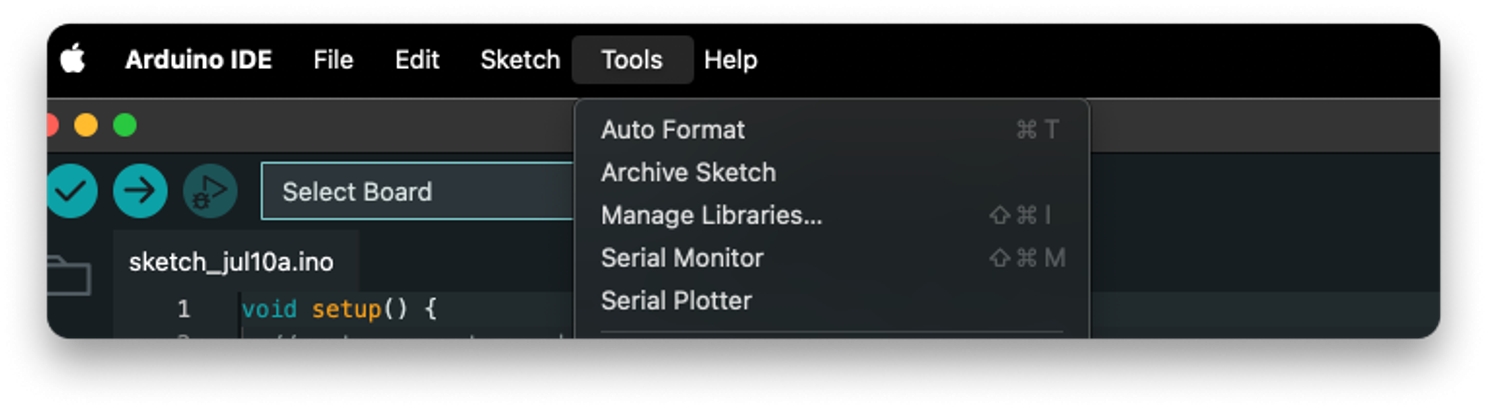
You may see an error in the output box after the upload is finished. This is normal; the IDE loses track of some boards after it resets them when the upload is finished. You can bring up the Serial Monitor from the Tools menu on the IDE to confirm that the board is connecting to WiFi properly:
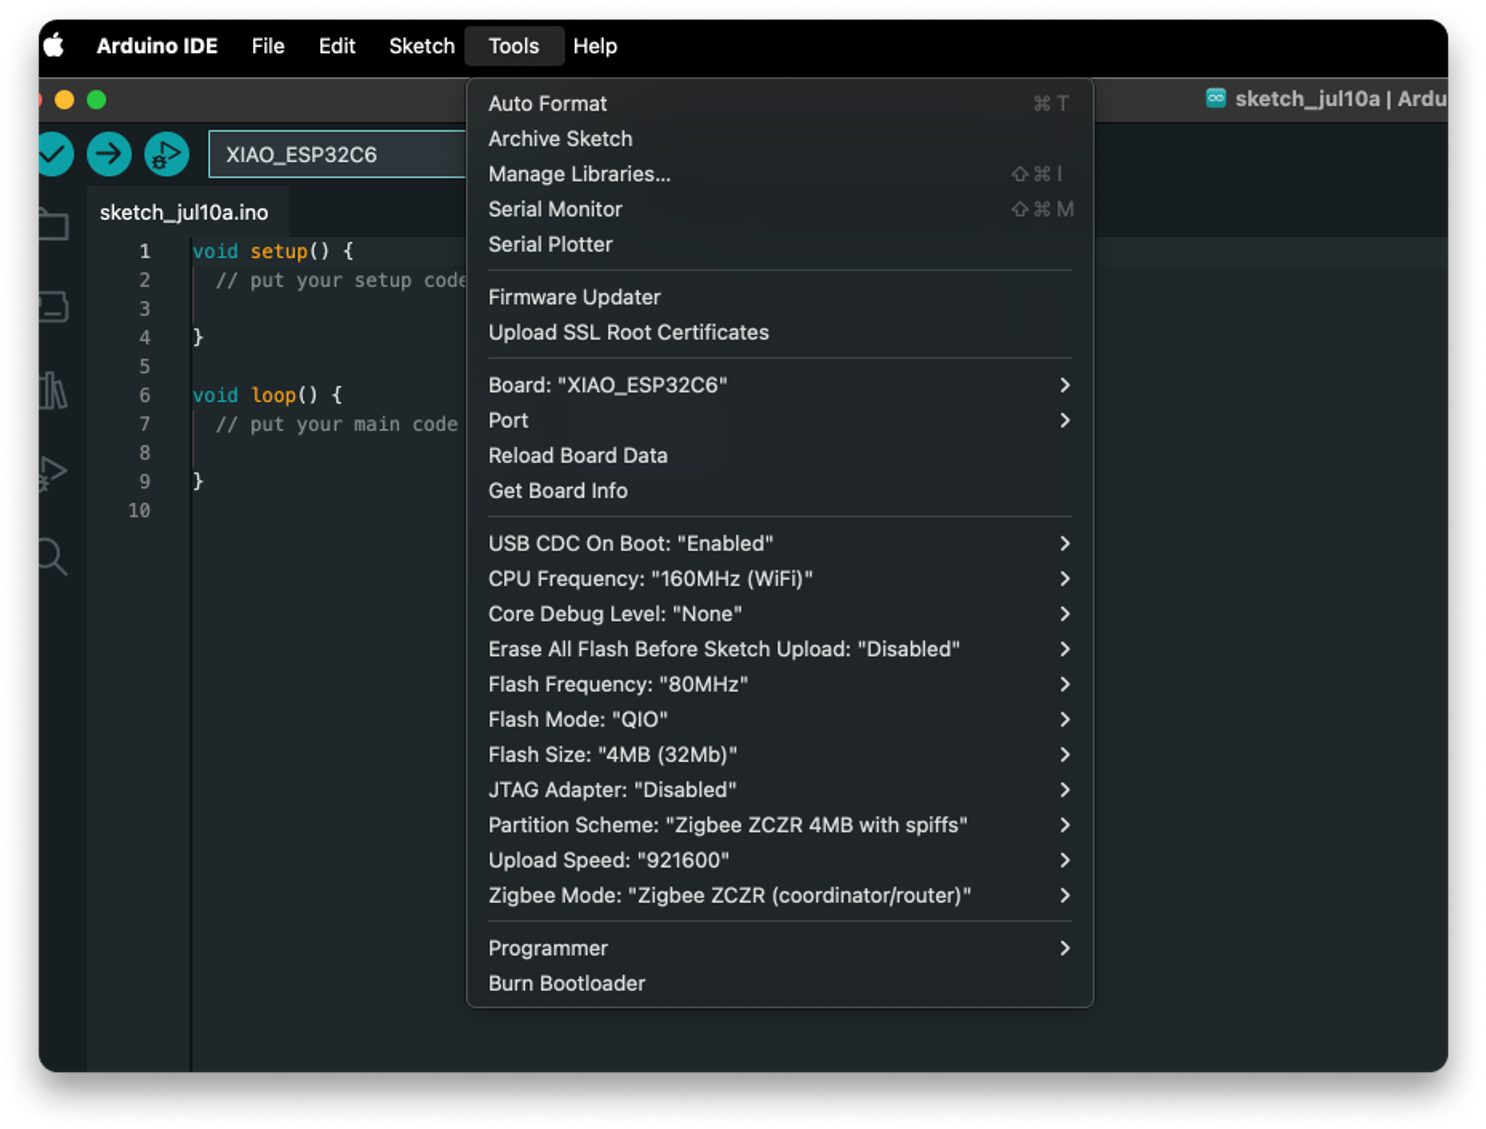
Next, we’ll move on to programming the ESP32C6 board. Unplug the ESP32C3, plug in the C6, and then choose XIAO_ESP32C6 as the board we’re connecting to.
This board is going to handle connecting to our Zigbee lightbulb and making it flash when it gets a signal. It will connect to any Zigbee devices in pairing mode for the first 3 minutes after it starts, and your lightbulb should automatically go into pairing mode when giving it power (see instructions on the lightbulb for resetting it if necessary).
In addition to choosing the board and port, we also need to set a couple of settings in the IDE to make sure things are set up properly to use the Zigbee network. In the Tools menu, you’ll need to set the Zigbee mode to “Zigbee ZBCR(coordinator/router).” You’ll also need to set the Partition Scheme to “Zigbee ZCZR 4MB with spiffs.”
Once those things are set, you’ll find the code for this controller in the GitHub repo here. Copy the zigbee.ino file into the IDE and you should be able to upload it without any changes. After this uploads, it’ll automatically start pairing, so you can power up your lightbulb now and let the two devices get acquainted. Again, the serial monitor should show you the pairing process so you can see what’s happening.
Putting everything together#putting-everything-together
Once both microcontrollers are programmed, you’re ready to wire things together. Plug both controllers into a breadboard and connect the wires as shown here:
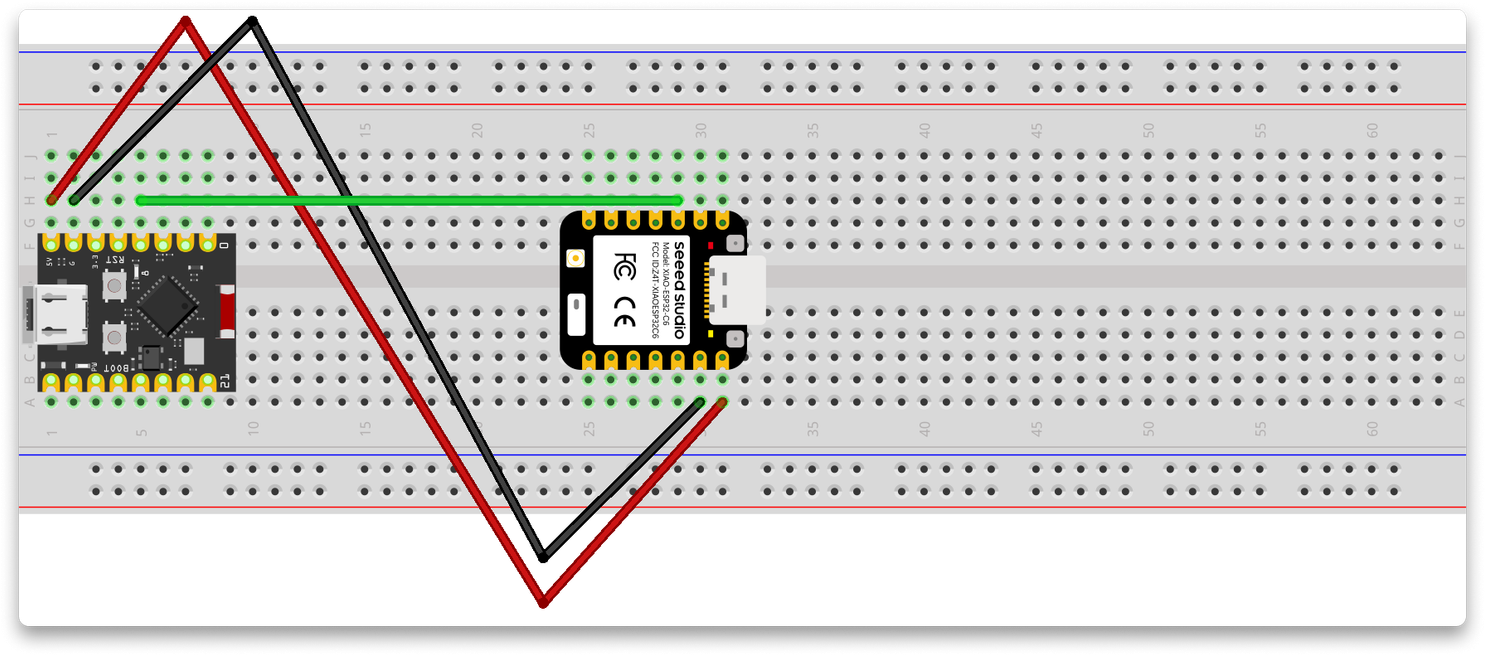
Just to be extra clear, the red wire connects the 5V pin of the ESP32C3 to the 5V pin of the ESP32C6, the black wire connects the GND pin of the C3 to the GRD pin of the C6 and the green wire connects GPIO pin 3 of the C3 to GPIO pin 2 of the C6. Note that, in this configuration, you should only connect one board to power (via the USB cable). Connecting both boards to power at the same time will almost certainly burn out one or both of them. You can power this project with a separate 5V power supply if you have one, but the USB connection to your computer will supply 5V, so that’s all you should need.
Once everything is wired and powered up, with the lightbulb on and paired, all that’s left to do is wait for an alert (or trigger one yourself) and enjoy the light show (and maybe also answer the alert).
So that’s some real hacking. I did this out in my woodshop, so I won’t miss a page if I have power tools running, but there’s a lot you could do to extend this to other smart devices, or connect it to any existing home automation you might have. If you find a cool use for this, be sure to let us know. We love seeing what hackers can do!