Starting Incidents
There are several methods for declaring incidents in FireHydrant:
- Manually from Slack using our Slackbot
- Manually via the Web UI
- Using Alert Routing
- Via integrations like Zendesk or Backstage
- Programmatically using the API
Creating incidents
Via Slack
As you may have seen from the Slack Responder Guide, FireHydrant provides a Slackbot so you can conduct incidents end-to-end directly from your chat tool. There are multiple ways you can start an incident from within Slack:
App home
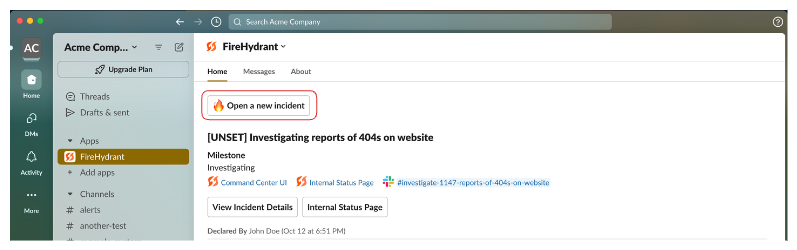
Opening a new incident from the FireHydrant Slack app home tab
- In Slack, navigate to Apps and look for FireHydrant.
- Click on the Home tab if you're not already there, and you should see the "Open a new incident" button.
Slack commands
FireHydrant's Slackbot can be interacted with using any one of three command aliases: /fh, /firehydrant, or /incident.
You can open the same new incident modal as above by running /fh new, and you can also get visual buttons to click by running either /fh by itself or /fh help.
Note:
At FireHydrant, we have a saying which is "Anyone can call the fire department." All of your users in Slack can declare incidents regardless of whether they have FireHydrant licenses.
From existing threads and messages
- From any channel or thread, click the ellipses in Slack next to a message. There will be an option to open a new incident as well as add the message to an existing incident.
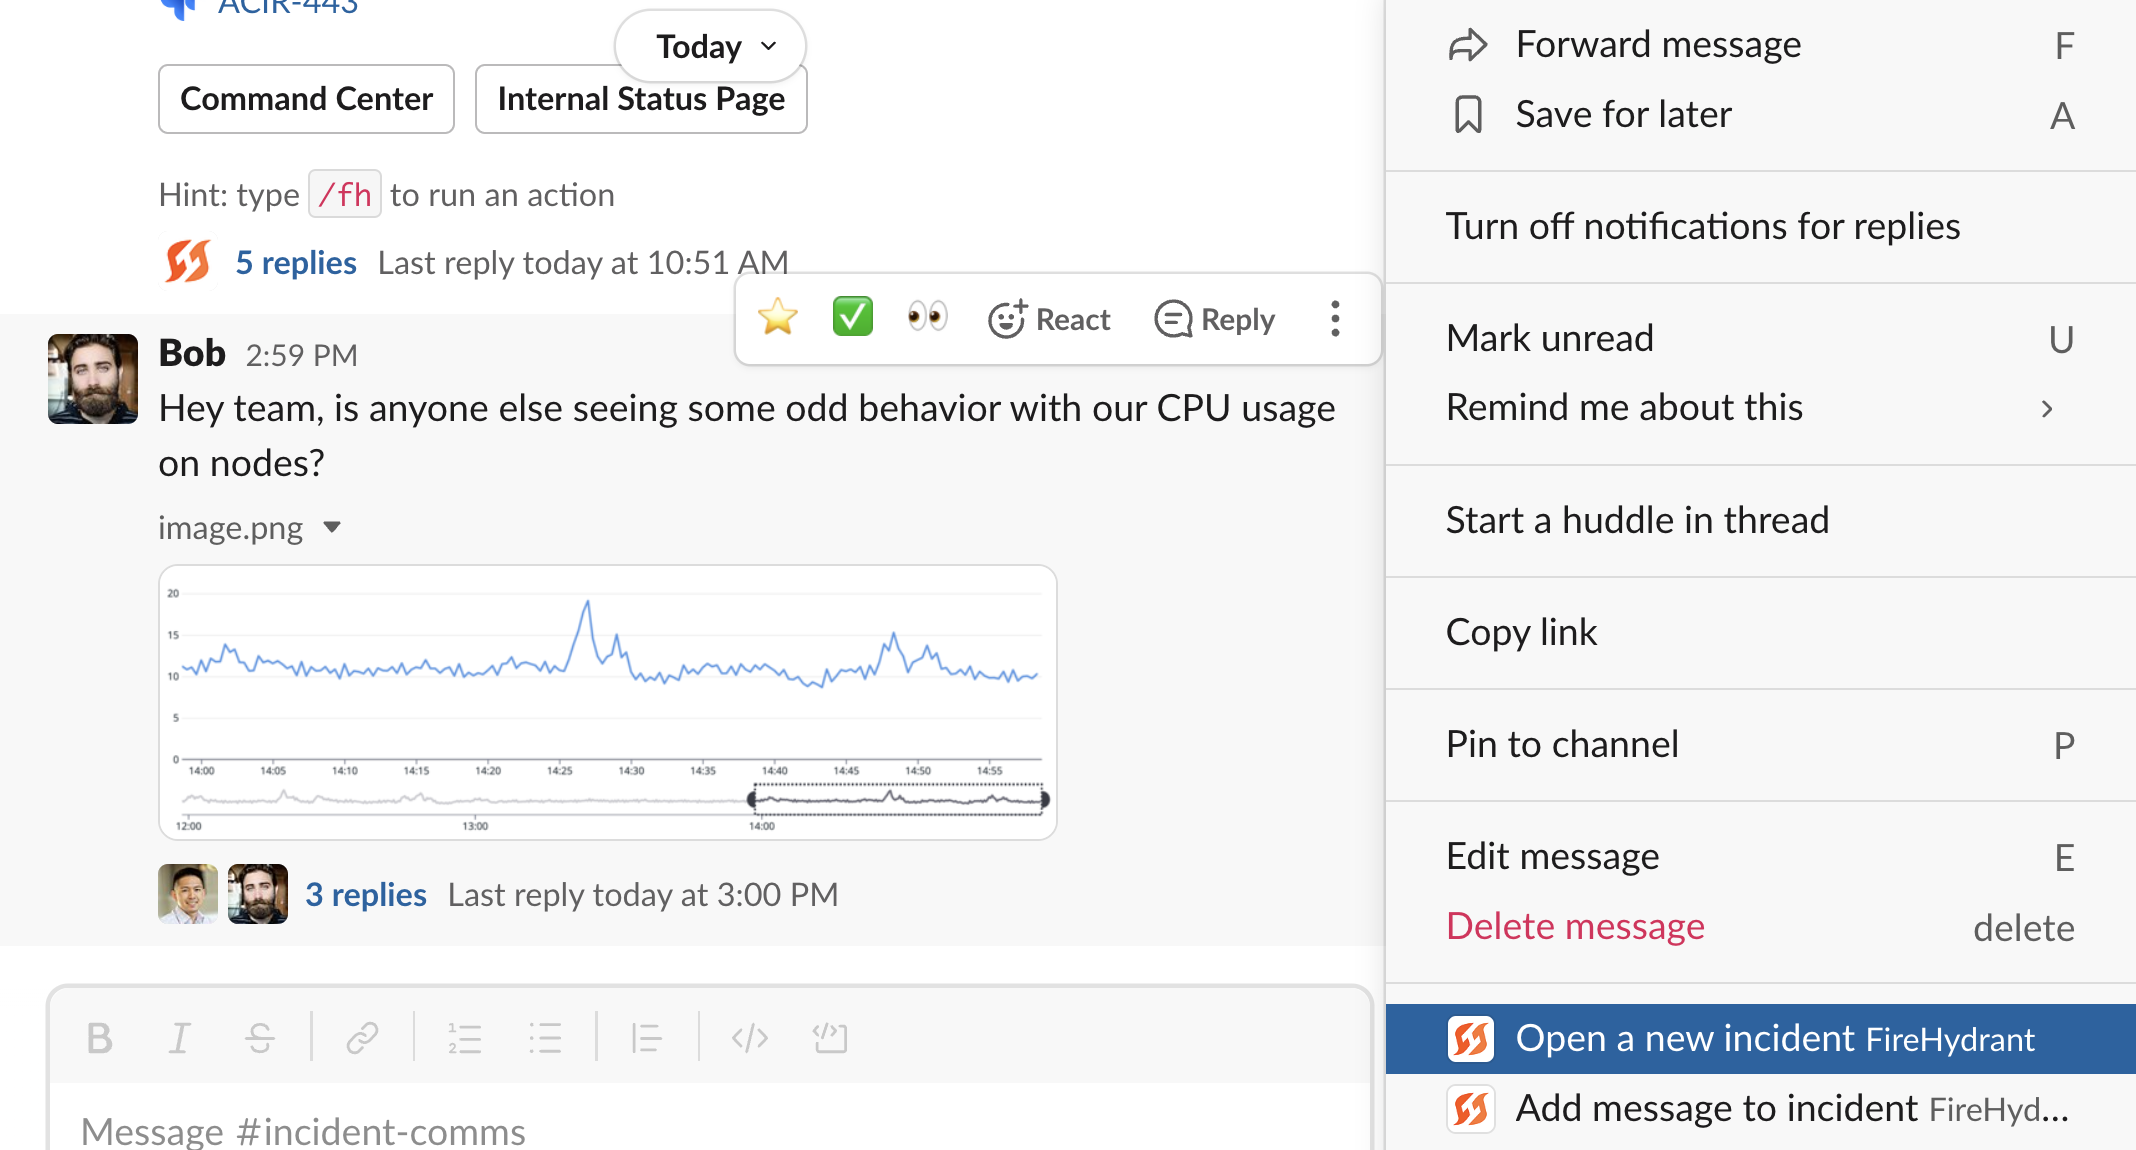
Declaring an incident from a message/thread
- Click Open a new Incident. This pops open the same declaration modal as you've configured, but this time, FireHydrant automatically inserts a link to the message in the description of the incident. Fill in information as needed and declare the incident.
Using Incident Channels
Via Web UI
Unlike Slack, in order to declare an incident from the web UI, you must have a FireHydrant account and be logged in. To open a new incident from the FireHydrant Web UI:
- From anywhere within the app, you should see the Declare Incident button on the top right. Click on it.
- You'll be taken to the declaration form. From here, you can either choose a pre-defined Incident Type or you can pick and choose fields to fill ad-hoc.
- Provide the Incident Name to declare an incident. A name for the incident is required always, but you can customize the rest of the fields.
- Short descriptions for each of these fields appear on the web UI; read these descriptions, or click the
 icon for helper text describing each field.
- Short descriptions for each of these fields appear on the web UI; read these descriptions, or click the
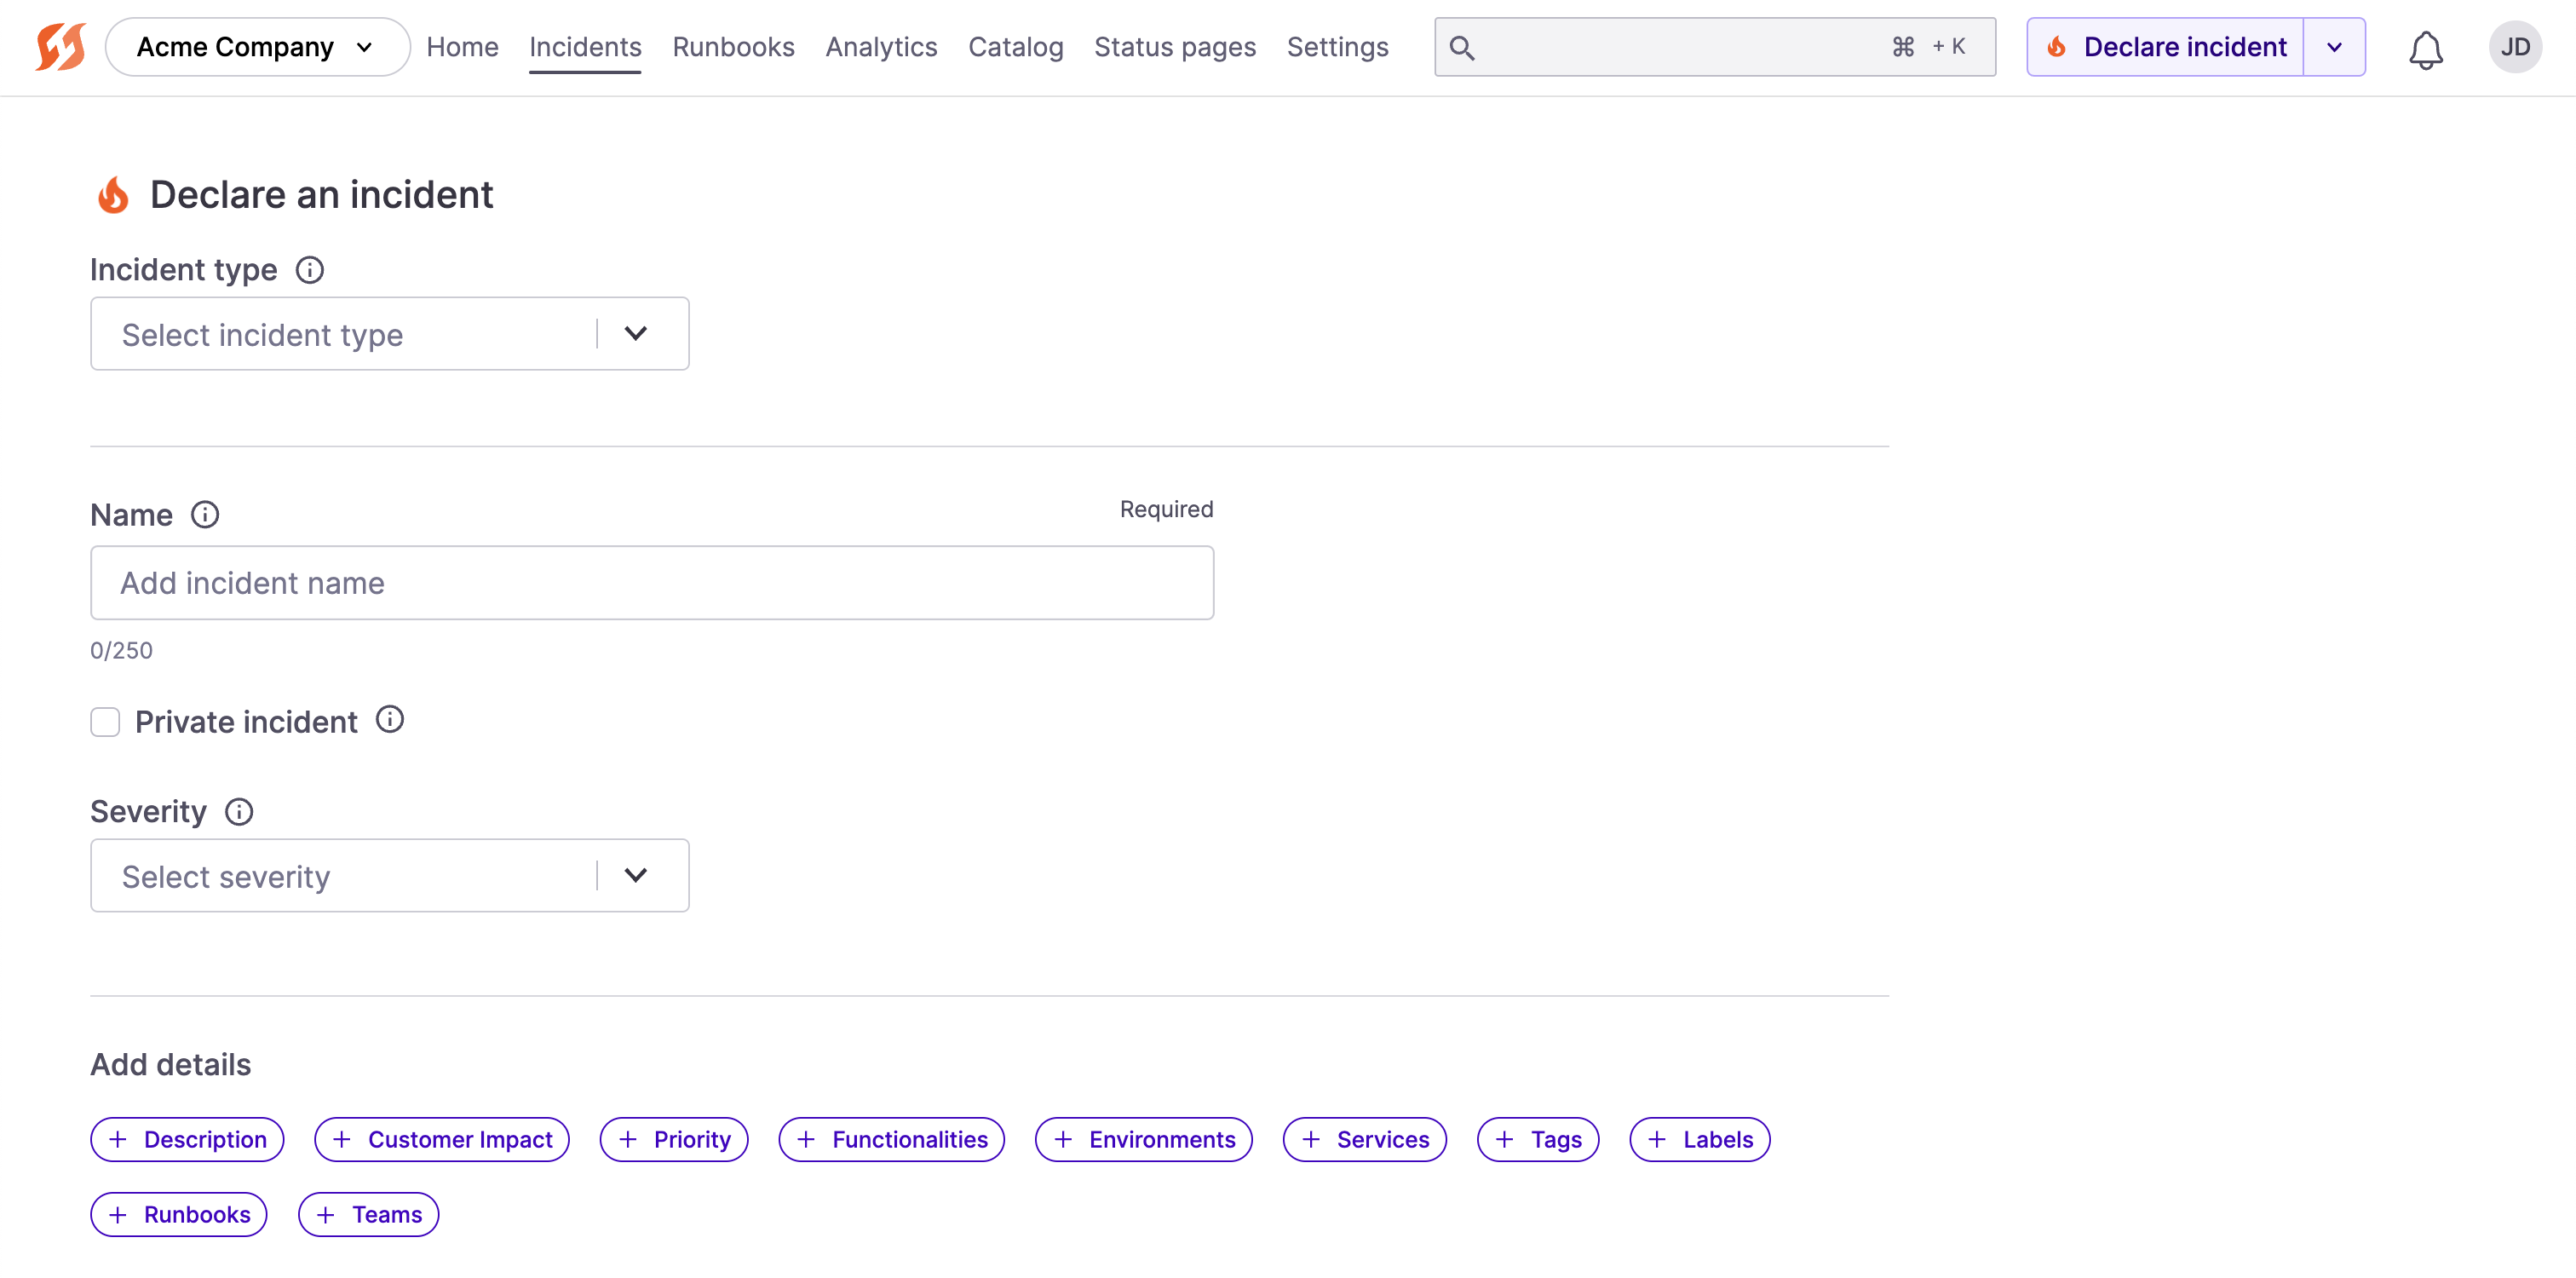
Declare incident from in the Web UI
After you add and fill out any relevant fields, click Declare incident to create the incident.
Pro-Tip:
Assuming you're logged in, you can quickly access the web declaration form by visiting https://fh.new. This will automatically take you to the declaration form in the Web UI, using whichever account you're logged into and whichever organization is your default org. Pretty convenient, huh?
Via Signals
FireHydrant offers Signals, and built-in alerting and on-call management platform within FireHydrant. Any inbound webhooks from external sources can be matched on Alert Rules configured by teams to become alerts.
When responders are paged/alerted, they can respond to the alert by escalating/promoting it into an incident.
Read more about this capability.
Via Alert Routing
For any 3rd-party alerting providers, Alert Routing on FireHydrant lets you receive webhooks or alerts from various sources (native integration or custom) to make decisions on FireHydrant.
You can configure four reactions to each inbound alert on FireHydrant:
- Automatically start an incident
- Notify specific Slack channels and await manual confirmation before starting
- Log the alert, but neither notify nor start an incident
- Ignore the alert and do nothing
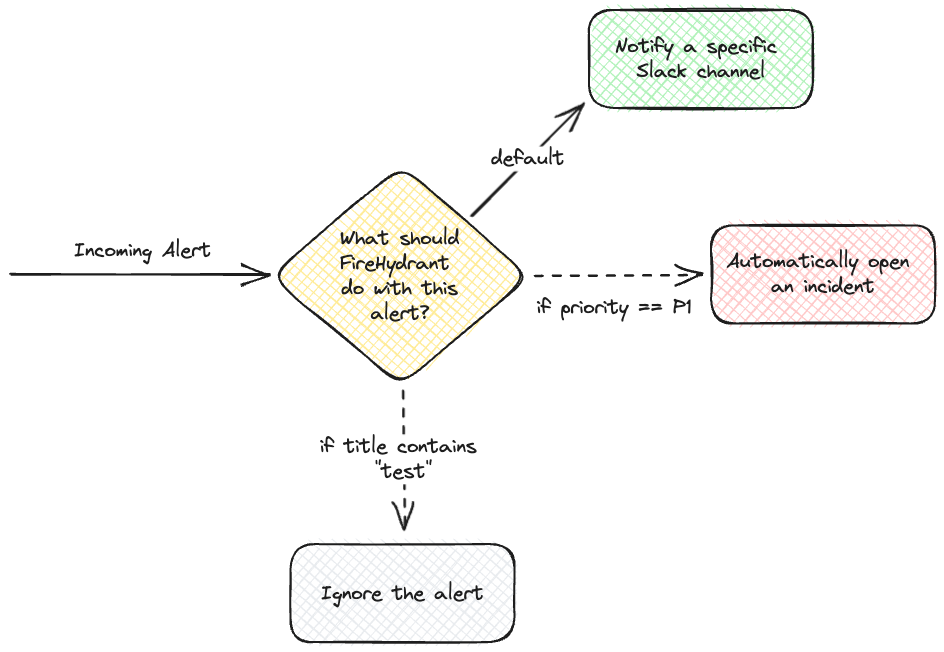
When configuring these decisions, you can make decisions based on numerous parameters within the incoming request body, depending on the integration. For more information, visit Alert Routing docs.
If you have inbound alerts configured, then you will see them appear in your default alerting channel configured in Slack like so:
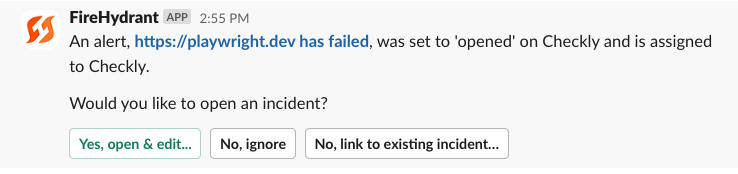
Example failed check from Checkly alerting the Slack channel
Via Integrations
Specific integrations like Zendesk and Backstage have modules or plugins within their tools that FireHydrant has worked to build.
For example, you can declare incidents directly from your Zendesk portal via the FireHydrant App:
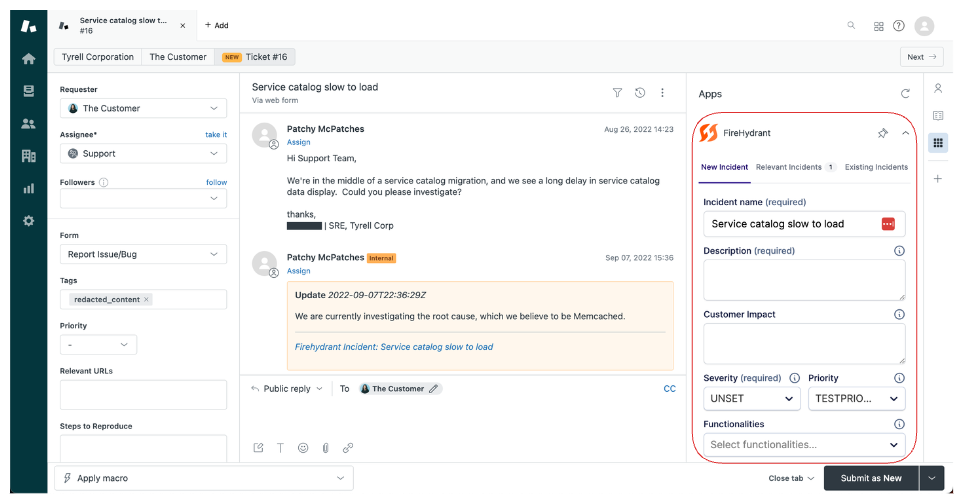
FireHydrant App in Zendesk
The same is available via the Backstage integration as well, and we have plenty of other integrations on the future roadmap.
Via API
Almost everything you do on FireHydrant is programmatically accessible by our robust API. To declare an incident via API, use POST /incidents remembering your authorization headers and request body. Here's an example:
curl --request POST \
  --url https://api.firehydrant.io/v1/incidents \
  --header 'Authorization: fhb-56e00f351d5bc767b32a02e9c16a6809' \
  --header 'Content-Type: application/json' \
  --data '{
  "name": "My API-induced incident",
  "description": "This is an example API call to create an incident",
  "severity": "TRIAGE",
  "impacts": [
    {
      "type": "service",
      "id": "12345-my-service-id",
      "condition_id": "12345-my-condition-id"
    }
  ]
}'
Configuring declaration
For both the Web UI as well as the Slack form, FireHydrant offers the ability to customize what you see and which fields are required when declaring an incident.
To read more about this, visit Incident Fields documentation.
Next Steps
- Adding Responders
- Learn more about Alert Routing
- Managing Tasks
Updated 10 days ago