Jira Field Mapping
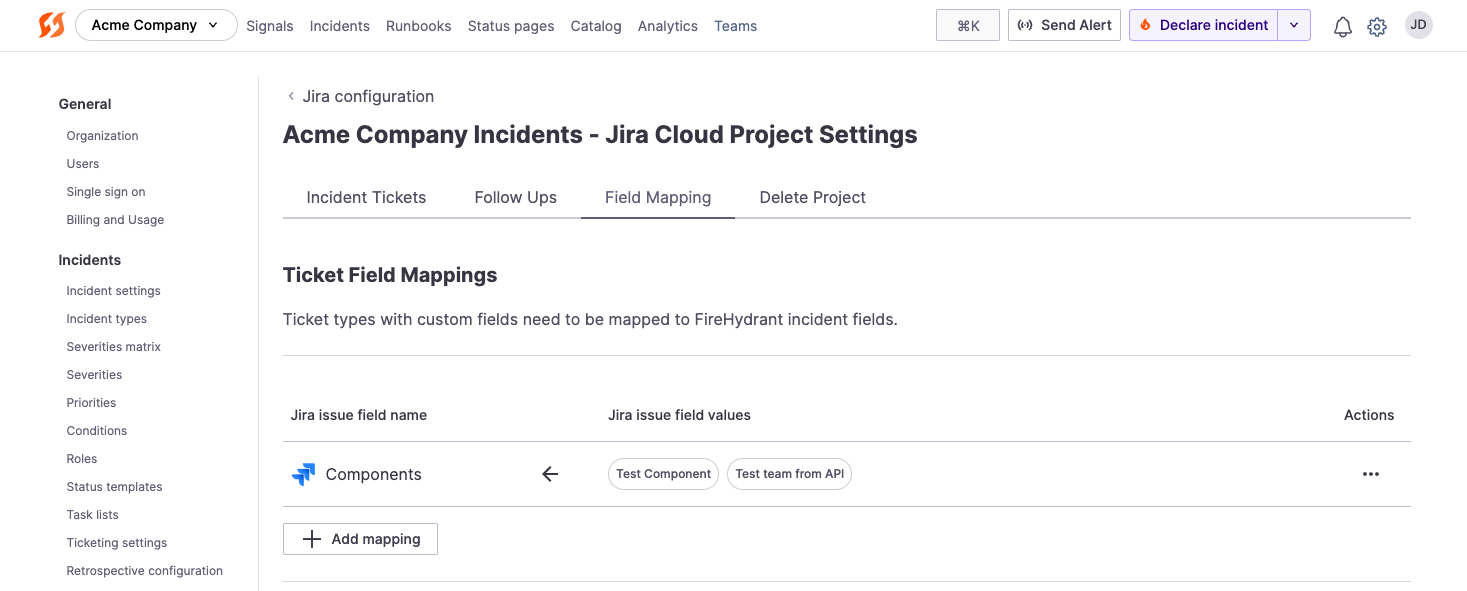
Field Mapping tab in Jira projects
FireHydrant's incidents have numerous out-of-box fields as well as custom fields. Subsequently, organizations may need to map these FireHydrant fields to Jira fields when creating tickets. FireHydrant allows for this via the Field Mapping tab.
This step is required if your organization's Jira project(s) have custom required fields, in which case these mappings must be configured, or API calls will fail.
Prerequisites
- You will need Owner permissions on FireHydrant to configure integrations.
- You must have already created at least one Jira project.
- If not, see the guides for Jira Cloud or Jira Server (On-Premise).
Default mappings
When you create Jira incident tickets or follow-up tickets from FireHydrant, these are the following default behaviors. You must set up custom field mappings if you'd like anything more or to override/customize the behaviors below when creating Jira tickets.
Incident tickets
| Jira Field Name | Description |
|---|---|
| Summary | Whatever you set inside the Runbook step. |
| Description | Whatever you set inside the Runbook step. A link back to the incident that executed this step will be appended at the end. |
| Status | Maps the status according to what you configured for Milestone Mappings under Incident Tickets tab when configuring the project. Any changes to the incident's Milestone will automatically update the status of the corresponding Jira ticket. Note: Changes made to the ticket status directly will be overwritten by changes to FireHydrant incident milestone. |
| Reporter | Attempts to set the user who started the incident by matching email addresses, otherwise falls back to the default authorized user that configured the integration (Note: Jira Cloud only). |
| Labels | Includes the incident's Severity, Priority, and "firehydrant" always. |
Follow-Up tickets
| Jira Field Name | Description |
|---|---|
| Summary | Whatever you fill for Title when creating the Follow-Up within FireHydrant |
| Description | Whatever you fill for Description within FireHydrant |
| Linked issues | Relates to the original Incident Jira ticket using the relationship you specified when configuring the project, if such a ticket exists |
| Status | Maps the status according to Folow up status mappings under the Follow Ups tab when configuring the project. Note: This parameter is 2-way. Changes to the follow-up ticket's status in Jira will change the follow-up's status in FireHydrant. |
| Reporter | Attempts to match the user who created the Follow-Up by matching email addresses, otherwise falls back to the default authorized user that configured the integration (Note: Jira Cloud only) |
| Labels | Includes the incident's Severity, Priority, and "firehydrant" always, along with any ticket tags you set when creating the Follow-Up in FireHydrant |
When do I need to configure custom mappings for fields?
There are multiple scenarios where you must configure field mappings for FireHydrant to be able to create tickets in your project(s):
- When you want more than the default mappings/behavior - See the previous section
- When you have custom, required fields - If a specific project has any required fields that are not set automatically above, especially if they are custom issue fields, then you'll need to configure them in FireHydrant so we know what to set for those fields
- (Sometimes) When using the Epic issue type - Some organizations have configurations in place such that when creating a ticket of type Epic, both Summary and Epic Name fields are required. In this instance, you must create a mapping for Epic Name (you can set it to a dynamic value, like
{{ incident.name }}, see below)
How to configure field mapping
Assuming you're in a situation where you must map fields, follow the instructions below.
- Navigate to the Jira settings page and click on the project you'd like to configure, then the Field Mapping tab.
- Click '+ Add mapping' to create a new mapping.
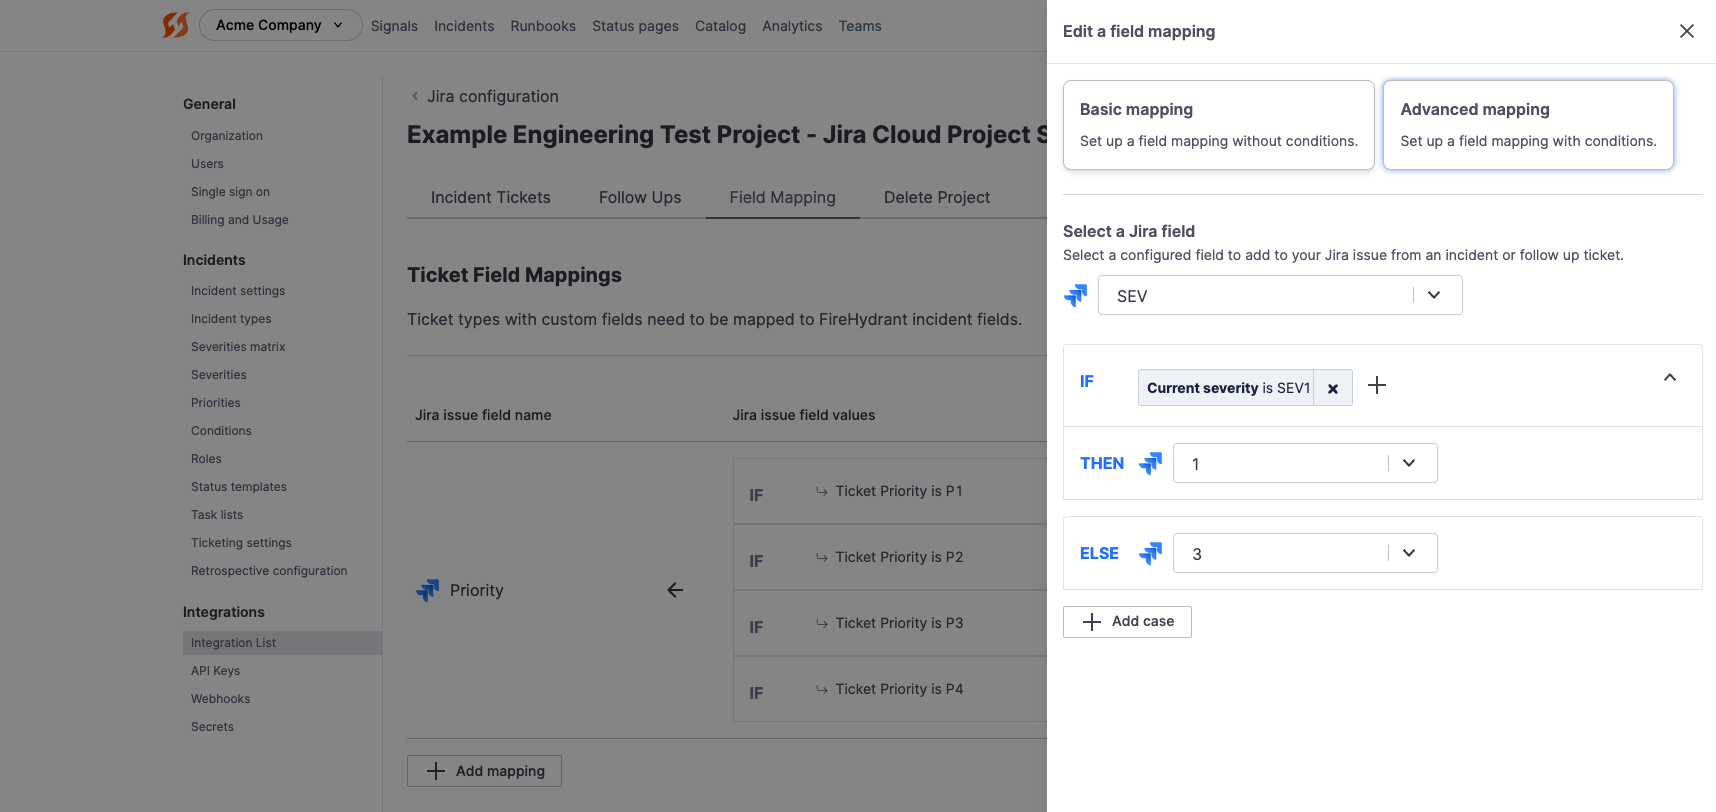
- A drawer will come out on the right where you can select between two choices:
- Basic mapping allows you to always set fields in Jira to the same values.
- Advanced mapping allows conditional logic to map different fields to different values in Jira based on various parameters within FireHydrant.
Custom field mappings in Jira
- You can select a Jira field once you've selected between basic vs. advanced mapping.
- If Basic, you can set the field's value, and this will apply each time you create the ticket and whenever any detail on the incident is updated.
- If Advanced, you can select conditions and values that should apply when those conditions are met, along with an Else default value if no conditions are met.
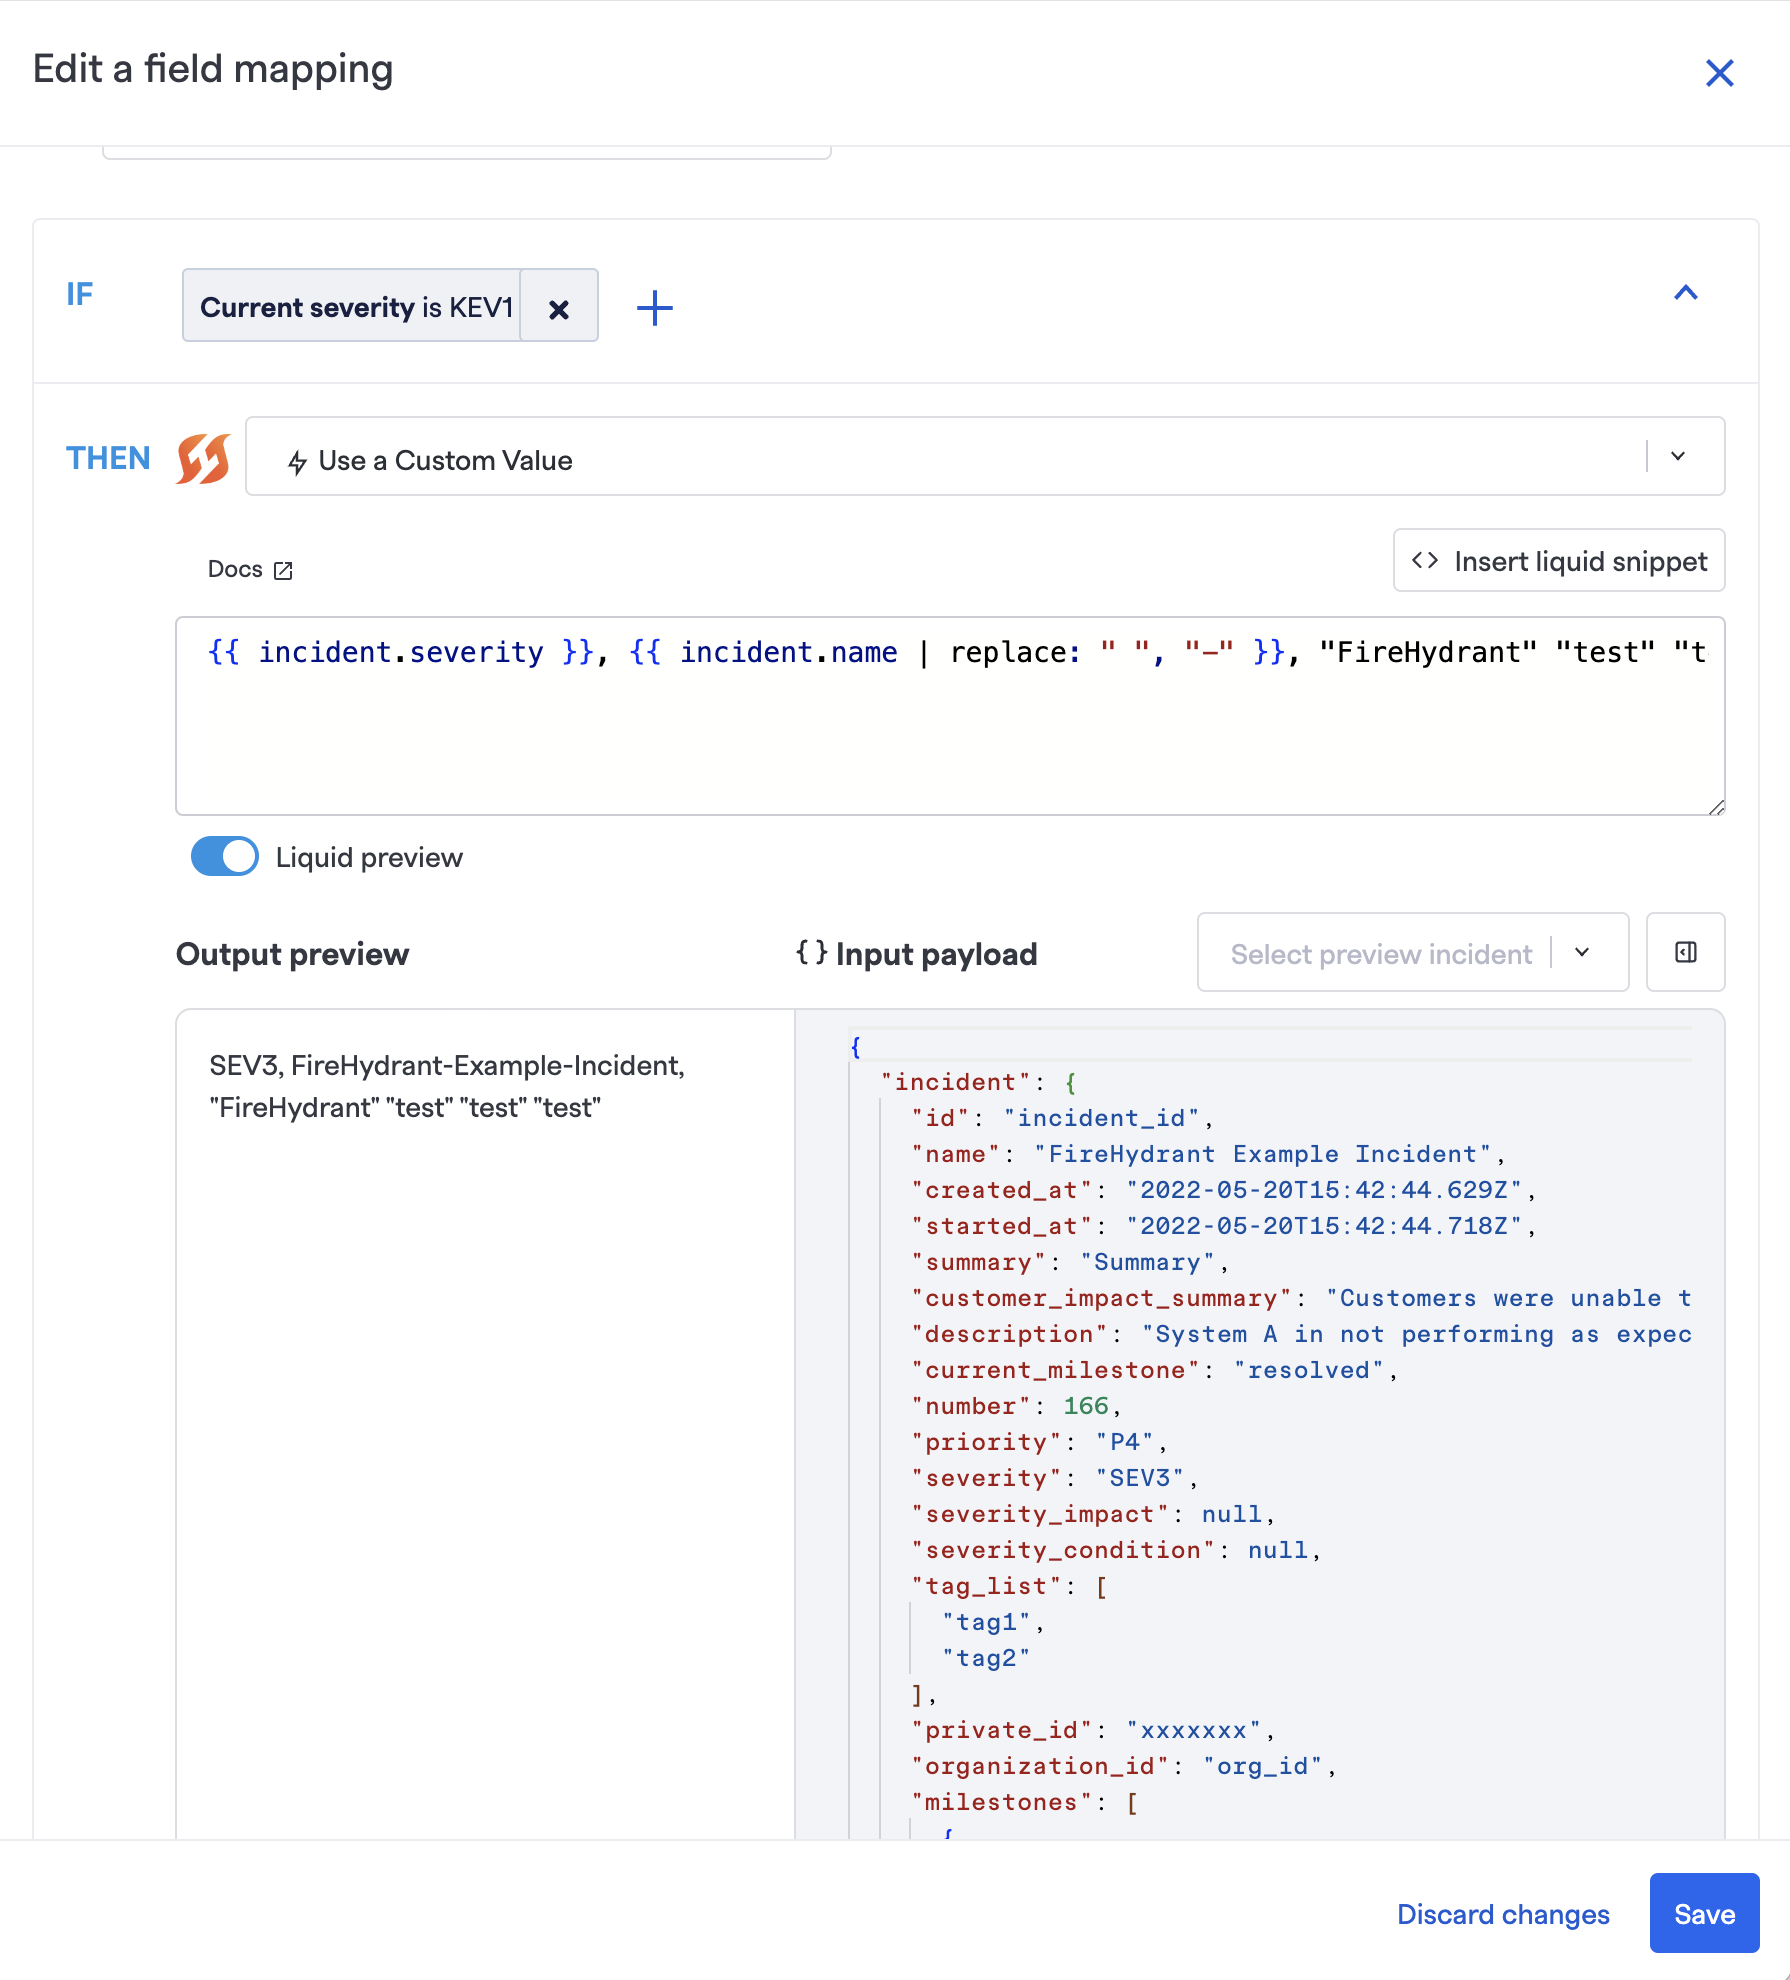
Note:
Field mappings for a project and its tickets are evaluated and applied upon every incident update. For example, if you have a condition to "set Jira ticket Severity field to
SEV1whenever the incident is isSEV1, otherwise default toSEV3," this will evaluate each time you make updates on the incident so that if the severity is escalated/de-escalated, the field in Jira will change accordingly.
- For values, you will see multiple possibilities depending on the field's configuration in Jira:
- For single-select fields: You will see a dropdown to choose an existing value from Jira
- For all other fields: You can choose between preset FireHydrant parameters and "Use a custom value." If you select Custom Value, you can input any value you'd like, and the field will also support Template Variables. Note that what you can insert as a custom value will depend on the field's settings in Jira. For in-depth examples, visit the section below.
- Once this field's mapping has been configured to your liking, click Save to persist. Rinse and repeat these steps for all fields you'd like to map.
Note:
Currently, the integration is one-way only. Changes to mapped fields for linked Jira tickets will not propagate back to FireHydrant.
Custom field mapping values
Custom values for Jira field mapping
Custom values allow you to input what you'd like us to send to Jira. Remember to check the type of the Jira field you are attempting to map, as some formats and inputs may not be accepted.
- The value entered must be valid for the target field for literal values.
- For things like datetimes, the value must be a valid JSON datetime.
- For options, the string value must match a valid option exactly.
- For arrays of strings, you can specify comma-separated values.
- Jira component-type fields can be handled by passing in an array as a literal value. For example, Liquid templating is supported if the dynamically generated text data type matches the Jira destination field.
Example Usage
In this example, we’ll pass the following dynamic variables to the Jira Labels field:
- Impacted functionalities
- Incident severity
- Incident number
1. Configure the field mapping
From the Integrations tiles, choose to edit the Jira configuration. For a Jira project of interest, add a literal value field mapping with the destination as the Jira Labels External field.
2. Impacted functionalities liquid syntax
The impacted functionalities array contains the name and ID, but we only want the name.
In this example, we’ve replaced any spaces in functionality names with a “-”. This is the Liquid code to pass in an array of impacted functionality names where each impacted functionality will get its own Jira label:
{{ incident.functionalities | map: "name" | join: "," | replace: " ", "-" }}
3. Incident severity liquid syntax
Now, we'll add a label for the current incident severity, which looks like this:
{{ incident.severity }}
4. Incident number liquid syntax
Lastly, we'll add a label for the incident number, which looks like this:
{{ incident.number }}
5. Putting it all together
Here is the liquid code all together:
{{ incident.functionalities | map: "name" | join: "," | replace: " ", "-" }}, {{ incident.severity }}, {{ incident.number }}
Copy this into the Value field. Click Update field mapping to save the configuration.
6. Use the mapping in a Jira incident ticket
Create a runbook step pointing to the Jira project with your new Label mapping.
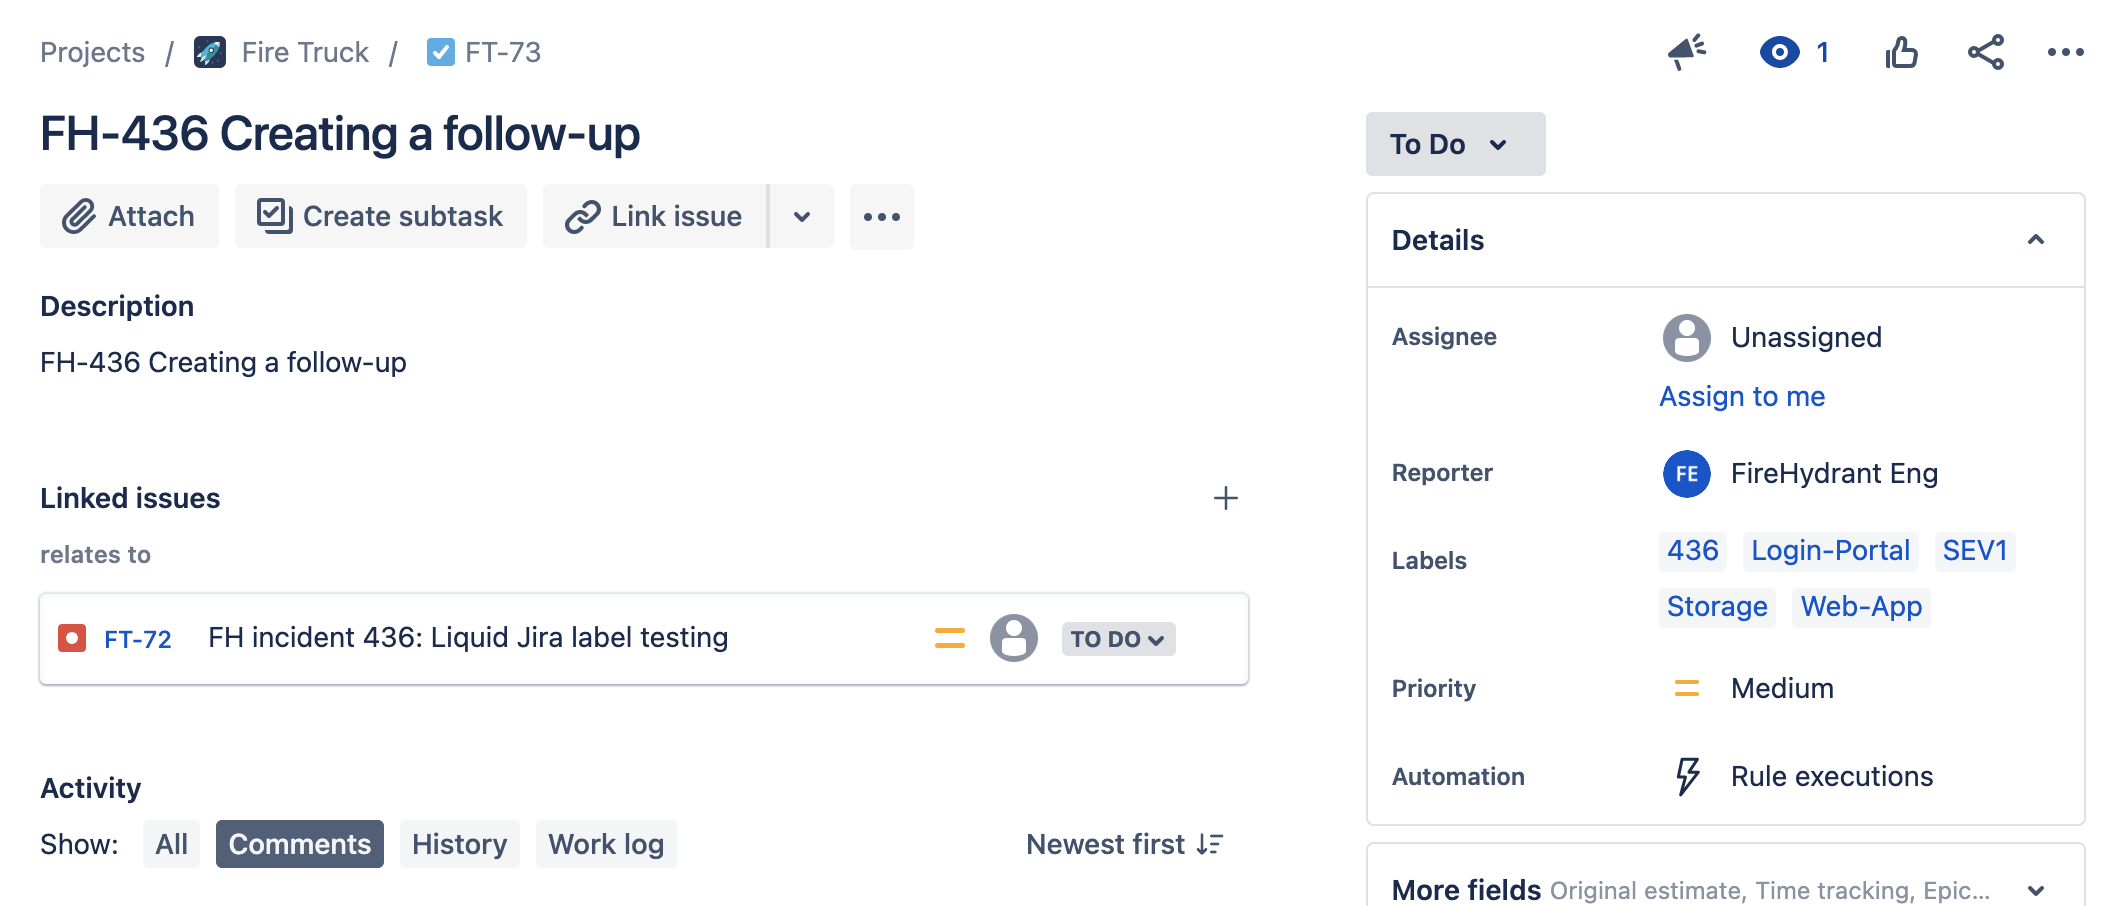
When an incident ticket is created with the mapped project fields, the impacted functionalities, incident number, and severity are passed to the Jira Labels field.
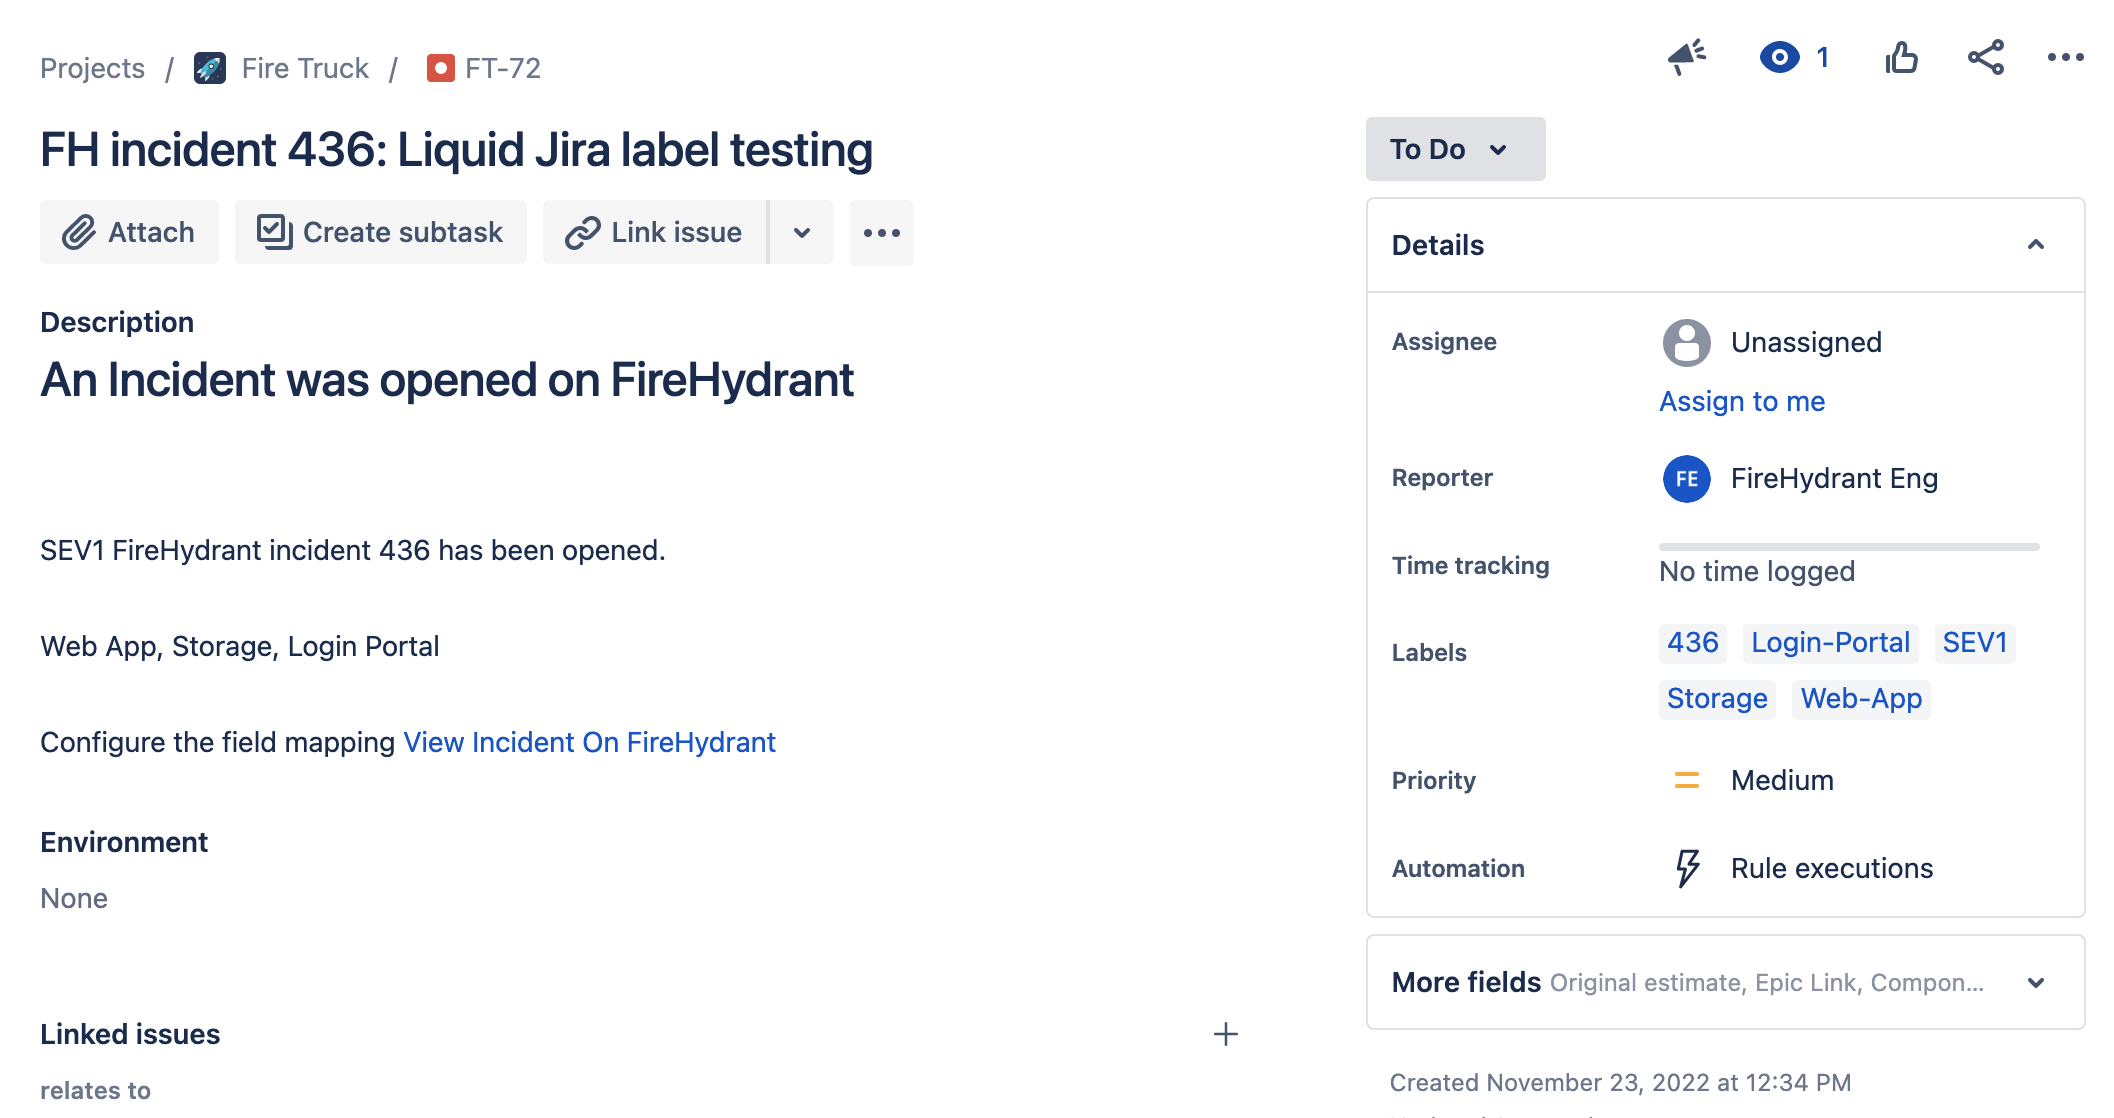
Custom labels mapped on an incident ticket in Jira
Once the field mapping is configured, the mappings will be applied to other tickets - incident or follow-up - created in the same project.
The same mappings for a Follow-Up created in the same project
Next Steps/Resources
- Learn more about FireHydrant's Template Variables
- Look at FireHydrant's Liquid Playground
- Browse the rest of our integrations
Updated 10 days ago