Readiness Checklists
Readiness Checklists can help standardize requirements across your Service Catalog, promoting Service maturity and resiliency.
An example use case is ensuring certain Services have assigned Owning and Responding teams, have monitoring configured, and have linked on-call schedules or escalation policies, etc. If the checklist is adhered to, you’ll have higher confidence in the durability of these services.
Create/Edit a Checklist
Navigate to Catalog in the navigation bar and then click Readiness Checklists. Here, you can click on "+ Add checklist" or click to edit an existing one. This will take you to identical pages which allow you to configure the following fields:
- Name - A name for the checklist. This field is required.
- Description - Writing a description can give context to the checklist's purpose.
- Connected Services - Which Services this checklist should apply to. You can add Services directly from this page or the Edit page of a Checklist, and you can also go directly to a Service and add the checklist there.
- Checklist Owner - Selecting an owning team adds responsibility for maintaining this checklist while establishing a point of contact if other collaborators have questions.
- Checks - Any number of checks can be created with descriptions. These allow you to create service standards across services you want the checklist to apply to.
Clicking the Save Checklist button will submit any new creation or changes.

Example Readiness Checklist
Checklist Usage
When a Service is associated with a Checklist, you will see all of these checks and their completion state listed in the Checklists tab of a Service. This can provide insight into whether a Service is operationally ready and prepared for incidents, should any occur.
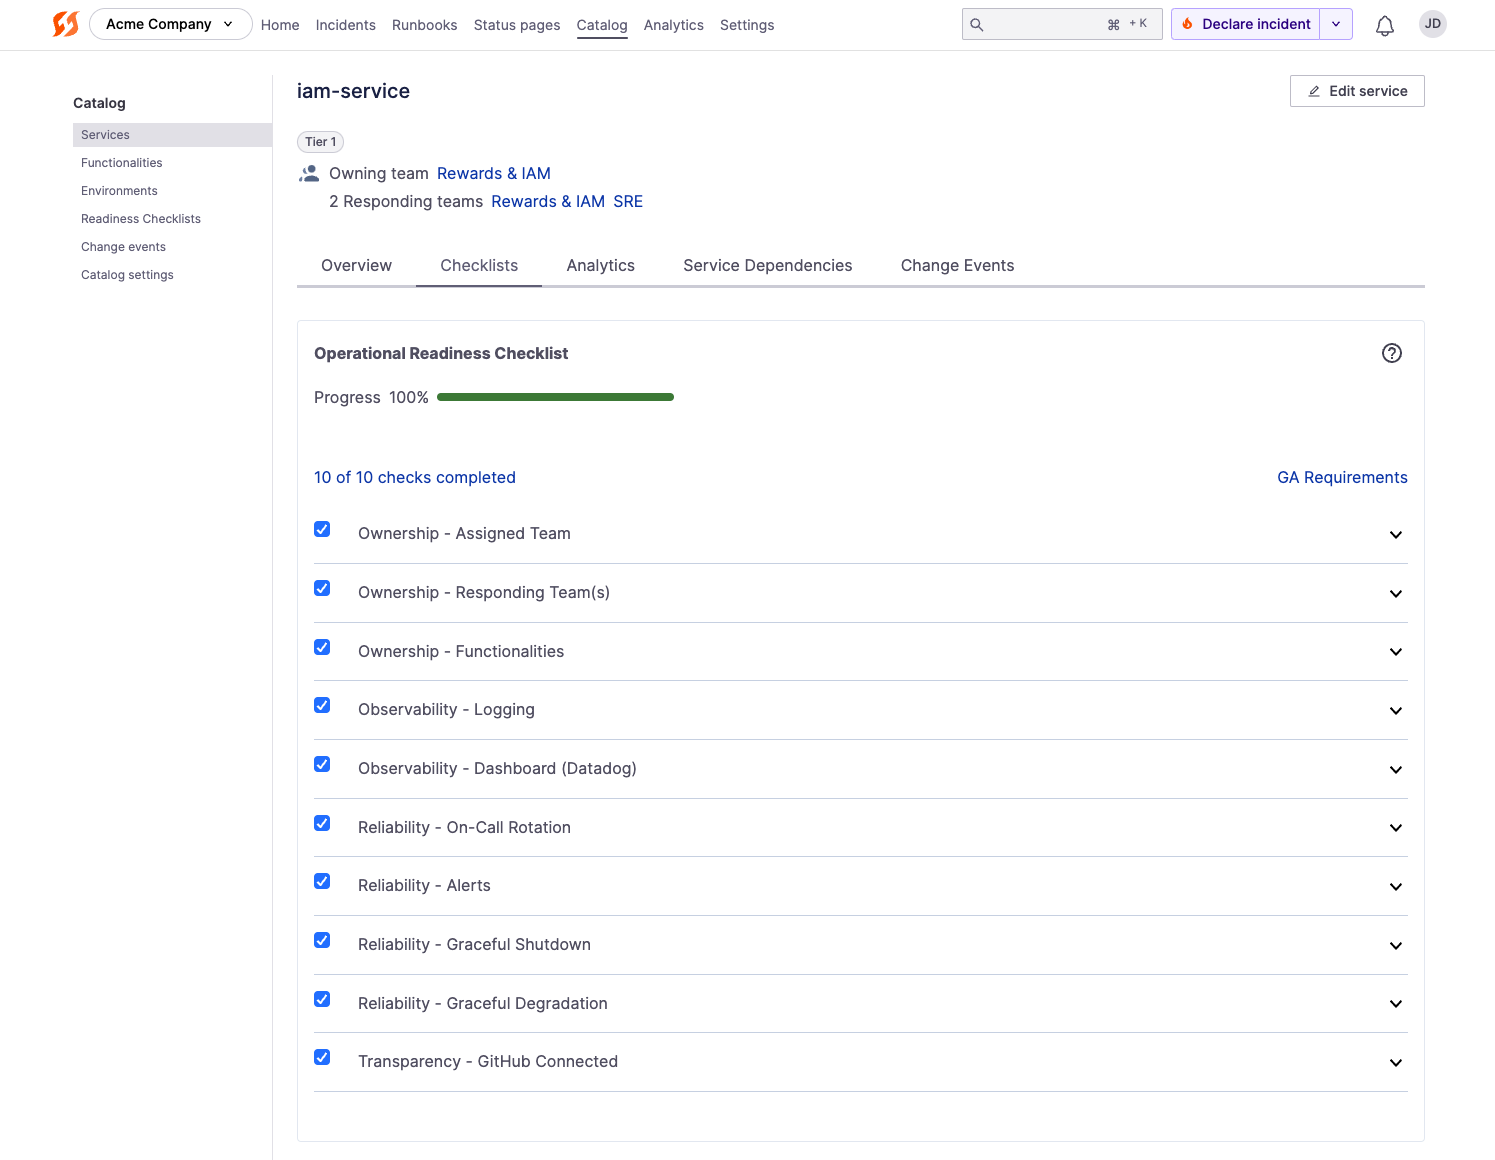
An example Readiness Checklist attached to a Service
Updated 4 months ago